Ahdarji’s Heirloom: walkthrough and quest design read
Ahdarji’s Heirloom walkthrough for Oblivion and Oblivion Remastered, covering quest stages, the Bravil and Leyawiin path, scripting notes, and common bugs.
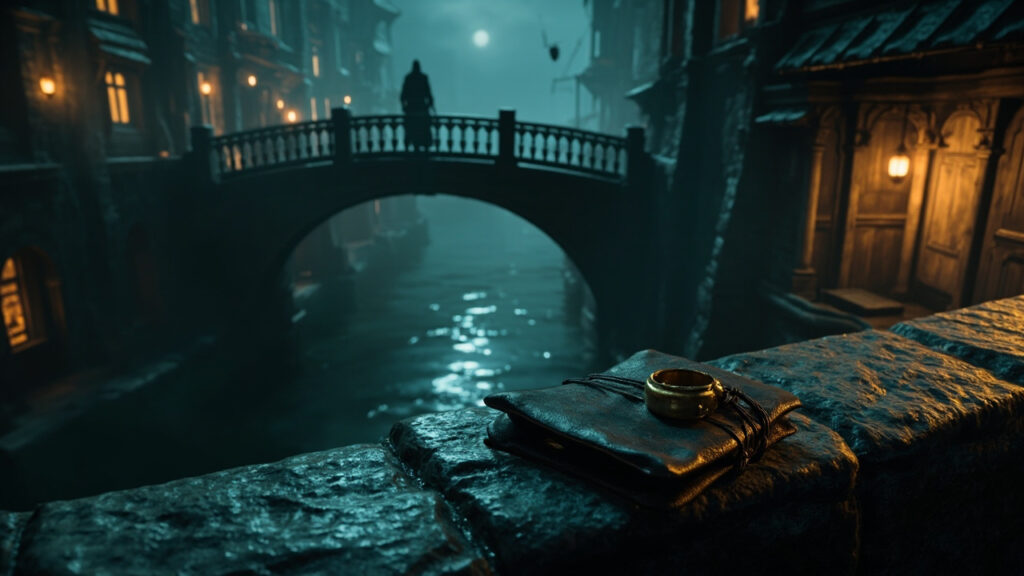
{"AIGC":{"Label":"1","ContentProducer":"MiniMax","ProduceID":"0701b9368dc04887d77d15bcf333c0ef","ReservedCode1":"{\"SecurityData\":{\"Type\":\"TC260PG\",\"Version\":1,\"PubSD\":[{\"Type\":\"DS\",\"AlgID\":\"1.2.156.10197.1.501\",\"TBSData\":{\"Type\":\"LabelMataData\"},\"Signature\":\"cd37842f8a7ab4222dc01e9b7d874ce4d35745983b4d13452c46129779ff08edc4f5cd43014c04bc3165142b986b469e285256c0e1a137970e254903241eb595\"},{\"Type\":\"DS\",\"AlgID\":\"1.2.156.10197.1.501\",\"TBSData\":{\"Type\":\"Binding\",\"BType\":\"0\"},\"Signature\":\"fce5982860ccdfa8c744065bbb005817849ac350cc0ef141e29f778e95fe5ddcfc8b5df850fa8bd96fee749cb628ee094d79bd7178565b8207ff2444f7091574\"},{\"Type\":\"PubKey\",\"AlgID\":\"1.2.156.10197.1.501\",\"TBSData\":{\"Type\":\"\"},\"KeyValue\":\"00a0b3b0b6a0c9b0c89cab328342af4e8221ec5b40799cbe835ab4251f7b47e4fd\"}],\"Bindings\":[{\"Type\":\"Hash\",\"AlgID\":\"1.2.156.10197.1.401\",\"TBSData\":{\"Type\":\"\"},\"Signature\":\"aeab68f6ce4c84c6cc66265a0922ad58578518f28bafdfb15ea5cd5867bf505f\"}]}}","ContentPropagator":"MiniMax","PropagateID":"","ReservedCode2":""}}
Ahdarji’s Heirloom: a walkthrough and quest design read
Ahdarji’s Heirloom opens in Bravil under S’Krivva, once the player has fenced more than 200 gold of stolen goods through the regional Thieves Guild fences. The job on the surface is plain: a Khajit named Ahdarji in Leyawiin has lost a family ring to a freelance thief called Amusei, and the player is asked to recover it. The reason the quest has a long tail of bug reports is that underneath the surface the quest is a small coordination problem. Two cities, two factions, an arrested NPC, a state-dependent dungeon door, and one ring whose spawn is sensitive to script ordering. Reading the quest as a sequence of state changes, rather than a list of dialogue options, makes both the walkthrough and the failure modes easier to follow.
This article is a combined walkthrough and design read. The walkthrough section gives the safe order of operations, the scripting section explains why that order is the safe one, and the troubleshooting section collects the failure modes that show up in player reports. The structural facts below are anchored to the IGN walkthrough for Ahdarji’s Heirloom, which treats the ring as a single stateful object referenced from several scripts and warns that the quest is “pretty buggy” if the tasks are done out of order. The same page has been updated and verified for the Oblivion Remastered release, and the safe path described there still applies. For a step-by-step reference, the verified walkthrough at IGN covers the same quest order in a more compact list form.
Quest overview and prerequisites
Ahdarji’s Heirloom sits between the small Imperial City jobs that introduce the Thieves Guild and the heavier Bravil and Leyawiin arcs that close the quest line. Mechanically it is short: three cell changes, one item recovery, and a return trip. As a teaching piece it does more work than its length suggests. It introduces the idea that the guild has regional contacts rather than a single hub, that some quest items are referenced from scripts attached to NPCs the player has never met, and that the guild’s reputation flag is a gate on the next regional job rather than a side effect.
Three things have to be true in the save before the quest can start. The player must have fenced at least 200 gold total through the regional fences, normally the Imperial City, Bravil, Anvil, and Leyawiin fences once unlocked. The quest tracker should show S’Krivva as the active Doyen for Bravil, which only happens after the previous regional arc resolves. And the player should be in a clean in-flight state, meaning the scripts attached to Amusei, the Leyawiin beggars, and the castle dungeon door are all in their default pre-quest state. Skipping any one of these tends to produce the “Amusei is gone” or “dungeon door is locked” symptoms that recur in bug reports.
Entry conditions and gating
The first gate is the 200 gold threshold. The value is set low enough that a player looting bandits and selling through fences for a few in-game days will clear it without noticing, and high enough that a player who skips the early fences is not pushed into the Bravil content too early. This is a common pattern in long quest lines: use a cumulative economy stat as a soft level cap so the player has time to learn the local systems before a new contact appears.
The second gate is regional. S’Krivva only becomes the active Doyen once the Bravil fence has been activated and the prior regional arc has resolved. A common mistake is to fast-travel to Bravil before the fence in the city has been discovered, which leaves the quest log showing the Doyen marker but the local scripts still pointing at a placeholder. The same region-relative gating shows up in the Cheydinhal and Anvil hooks, and it is one of the reasons the Thieves Guild feels less linear than the Mages Guild or Fighters Guild quest lines even though all three share an underlying regional grid.
Where to find S’Krivva and Ahdarji
S’Krivva has two reliable spawn anchors in Bravil. During the day she is usually inside her house when the door is unlocked, and at midday she tends to be at the Lonely Suitor Lodge, the waterfront inn closest to the Bravil bridge. The first conversation with her triggers the “first special job” dialogue, which opens Ahdarji’s Heirloom on the player’s quest log. The quest is also the first place where most players learn that the Bravil Doyen will not accept a stolen ring as proof of completion. S’Krivva wants the ring itself returned, so the player cannot shortcut the quest by fencing the ring and then trying to pay off the contact.
Ahdarji, the Khajit quest giver in Leyawiin, has a three-slot daily schedule that mirrors how many Thieves Guild contacts are built: a morning slot in her house, a midday slot at the Five Claws Lodge, and an evening slot at the Three Sisters Lodge. The quest script is keyed to the active schedule package, not to a fixed cell, which is why talking to her works in any of the three locations but only during her active hours. The practical rule, which covers most of the Thieves Guild quest line, is to talk to the contact while they are in their package, not just while they are in their cell.
Travel and time budgeting
Leyawiin is a long walk from Bravil if the player is on foot, and the quest does not gate the player’s movement. A safe plan is to wait inside an inn until morning, fast-travel to the Leyawiin West Gate, then make the rounds of the three lodges in a fixed order until the contact line resolves. The script that registers the meeting fires on dialogue start, not on line of sight, so the player does not need to be standing in a specific cell, only inside the right cell and inside the right time window. The same pattern shows up in the script for Methredhel and for several of the Dark Brotherhood contacts, which is why a single rule, “talk to the contact while they are in their package, not just while they are in their cell”, covers most of the Thieves Guild quest line.
Talking to Ahdarji and locating Amusei
The conversation with Ahdarji is short but does the heavy lifting for the quest. It sets the local quest stage flag that authorizes the beggars, the dungeon door, and Amusei’s dialogue to enter their quest-active states. Without that flag, the Leyawiin beggars will still respond, but they will not advance the quest, and the dungeon door will be locked by the default Castle Leyawiin script rather than the quest-specific override. Players who skip straight to the castle without talking to Ahdarji will sometimes find that the door opens because the override script fires late, and sometimes find that the door is permanently locked because the override never fires at all. Both outcomes are part of the same race condition.
After the conversation resolves, the quest points the player at the local beggars. The beggars in Leyawiin are not a single NPC but a small network, and the dialogue that opens the quest path is keyed to the player’s Thieves Guild rank. Once the player speaks to the right beggar, the dialogue reveals that Amusei has already been arrested by the city guard and is sitting in the dungeon beneath Castle Leyawiin. From here the quest splits into two branches. A stealthy branch has the player pay a small fee to the beggars, who make it clear that the guards are corrupt and that a meeting with Amusei can easily be arranged. A brute-force branch has the player use lockpicks or a key to enter the dungeon cell directly. Both branches converge on the same stage flag, but the stealth branch is the one the quest dialogue nudges the player toward, and the brute-force branch is the one that most often triggers quest bugs.
Why Amusei is already in jail
From a story design point of view, Amusei being already in prison is a useful move. It lets the quest skip the usual “find the thief in the wild” beat, which was already done in the earlier Thieves Guild initiation quest, and replaces it with a beat about access rather than combat. The quest can now teach the player that the Thieves Guild, the city guard, and the beggar network are three overlapping but separate systems, and that the player can move between them by paying attention to who is willing to take a bribe. The same beat also explains why the quest does not need a dungeon of its own. Castle Leyawiin’s dungeon is reused, the door script is temporarily overridden so the quest can enter, and the script is restored when the ring is recovered.
Entering Castle Leyawiin dungeon
Once the player has either paid the beggar or picked the dungeon lock, the quest moves into the dungeon stage. The cell that holds Amusei is a standard jail cell, but the quest attaches a stage flag to the cell door that the normal castle AI does not expect. The result is a door that the player can open, that the player can sometimes see NPCs open, and that the player can also find closed and locked with no obvious way in, depending on which scripts have fired in which order. The IGN walkthrough for Ahdarji’s Heirloom specifically flags this as a quest that is “pretty buggy” and recommends doing the tasks in order to make sure the key quest item actually spawns. That recommendation is a hint that the designers know the scripts are sensitive to ordering and have documented the safe path rather than fixing the underlying race.
The dungeon itself is short. Amusei sits in a cell, has a small pool of dialogue, and will hand over the ring once the player has the right persuasion or bribe value, or once the player has reached a specific stage flag. The ring is the actual quest item, and it is the object that most often fails to appear in the player’s inventory after the dialogue resolves. The ring object is created by a script on Amusei that runs once, and if the dialogue resolves before the script has time to fire, the ring never spawns. The recommended workaround is to save before the conversation, open the conversation, let the dialogue run to completion, then check the inventory before reloading.
Inside the dungeon: a step-by-step path
- Approach the dungeon door. If the door is locked and the override script has not fired, fast-travel out of the cell and back in to force a cell reset, then check the door again before picking the lock.
- Locate Amusei. He is the only NPC in the cell with a Thieves Guild “rival” faction tag, and his dialogue is gated by the quest stage flag set by the beggar conversation.
- Open dialogue and use the “let’s talk about the ring” option, which is the one that fires the script that creates the ring object on the player’s reference.
- Wait for the dialogue to close naturally, then check the inventory. The ring should be in the “Quest Items” tab, not the regular inventory, until the next quest stage.
- Exit the dungeon, save the game, then check the quest log. The “return the ring to S’Krivva” objective should be active, and the “find Amusei” objective should be marked complete.
Returning the ring to S’Krivva
The closing act of Ahdarji’s Heirloom takes place back in Bravil. Talking to S’Krivva with the ring in the inventory fires the “ring recovered” stage, which moves the ring from the Quest Items tab to a regular item, marks the quest as ready to turn in, and starts the reward dialogue. The reward is a modest gold payout, a small bump to Thieves Guild reputation, and a hint about the next regional job. The quest log is then updated, and the player’s next special job becomes available once another 200 gold of fencing has been completed. To clarify the background to History of the Internet, the History of the Internet offers a concise reference.
There is a known soft-lock at this point that is worth flagging in any walkthrough. If the player has equipped the ring at any point during the quest, the “turn in” dialogue option can refuse to fire, because the ring is treated as a worn item rather than a quest item on the player’s reference. The fix is to remove the ring from any equipped slot, including the amulet slot, before talking to S’Krivva. The same rule applies to the rings recovered in the later Thieves Guild quests, and it is a useful habit to develop for any quest that uses a wearable quest item.
Quest scripting notes for designers
Ahdarji’s Heirloom is a useful case study because it uses a small number of script patterns that show up across the rest of the Thieves Guild and across most of the faction quest lines in the game. Understanding these patterns makes it easier to diagnose failed quests in your own projects, because the symptoms are the same even when the labels and item names are different.
The first pattern is the “stage flag as a soft lock”. The quest does not use a single boolean to track completion. Instead it uses a numeric stage that is incremented by dialogue lines, by script blocks on doors and NPCs, and by the player’s inventory. Each stage has a script that runs once, then a set of result blocks that check the current stage and either advance the quest, end the quest, or wait for the next input. This is the same model used in the Construction Set’s quest editor and in most of the larger Oblivion mods, and it is the reason a single missed line of dialogue can leave a quest in a state where no further dialogue is offered but the quest log still expects an action.
The second pattern is the “object reference by alias”. The ring is not stored in a fixed cell or on a fixed NPC. It is created dynamically by a script that references an alias attached to Amusei, then placed on the player’s reference. If the alias has not resolved by the time the script runs, the ring is placed on the nearest valid container instead, which is the source of the well-known “the ring is on the dungeon floor” bug. Designers can avoid this by forcing the alias to resolve before the script block runs, which the original quest does by chaining the script to a dialogue result rather than to a timer.
The third pattern is the “regional Doyen flag”. The Thieves Guild tracks the player’s current regional contact as a single flag, and each Doyen dialogue checks that flag before offering a job. When a regional arc ends, the flag is moved to the next Doyen, and the previous Doyen’s dialogue switches to a small pool of generic lines. This is the pattern that lets the player wander between cities and still get a coherent story arc, and it is the pattern that Ahdarji’s Heirloom uses to gate the Bravil content behind the Leyawiin content.
Why ordering matters in this quest
The “do the tasks in order” advice in the verified walkthrough is a hint that the quest is sensitive to the order in which its script blocks run. Specifically, the quest assumes that the player will talk to Ahdarji before talking to the beggars, will talk to the beggars before approaching the castle, and will approach the castle before talking to Amusei. If the player breaks that order, the quest does not fail outright, but several scripts end up running in the wrong order, which can leave the dungeon door locked, the ring in the wrong cell, or the dialogue options missing. The robust fix in a custom project is to use a small state machine rather than a chain of independent flags, and to gate every script block on the full state rather than on a single flag.
Common bugs and how to recover from them
Ahdarji’s Heirloom has a small but persistent set of known bugs, mostly related to script ordering and to the ring object failing to spawn. The list below is the one that the verified walkthrough and the wider community agree on, with the recommended recovery for each. None of these fixes require a reload to before the quest, which is useful for players who are deep into a playthrough and who do not want to lose progress on the wider Thieves Guild arc.
Bug table: symptom, cause, fix
| Symptom | Likely cause | Recommended fix |
|---|---|---|
| Amusei is not in the dungeon cell | Previous Thieves Guild quest left Amusei in a non-default state | Wait 24 in-game hours inside a nearby cell to force a cell reset, then check the cell again |
| The dungeon door is permanently locked | The override script on the door did not fire because the beggar stage was skipped | Return to the beggar and complete that dialogue, then re-enter the castle exterior to reload the cell |
| Amusei offers no quest dialogue | The stage flag from the beggar conversation is below the threshold for the cell script | Re-enter the dungeon after a 24-hour wait, or reload the most recent save before the dungeon |
| The ring never appears in the inventory | The script block that creates the ring fired before the alias resolved | Check the dungeon floor and nearby containers, then reload the save before the conversation |
| S’Krivva offers no turn-in dialogue | The ring is equipped in a worn slot | Unequip the ring from all worn slots, then re-enter dialogue |
| The quest log says “find Amusei” but he is already dealt with | The stage increment for the Amusei step did not run | Open the console and run the matching SetStage, or reload the save before the conversation |
Design lessons that transfer to other projects
For developers reading this as a quest design case study, the most useful takeaway from Ahdarji’s Heirloom is that the quest is structurally small but stateful. The total content is maybe ten minutes of dialogue, three cell changes, and one item recovery, but the underlying state graph has at least a dozen nodes. The quest only feels stable because the designers were disciplined about the order in which the player is expected to encounter the nodes. When the order breaks, the quest surfaces the same bugs that show up in much larger open-world quests, just at a smaller scale.
Two patterns from the quest are worth porting into a new project. The first is the regional Doyen flag, which is a clean way to gate faction content without a hard level cap. The second is the alias-anchored quest item, which is a clean way to keep a quest item from getting stranded in a fixed cell when the player loses or breaks a save. Both patterns scale well from a single city to a multi-region faction, and both can be implemented in any quest system that supports stage flags, dialogue results, and named references.
A pattern that is best avoided is the silent reliance on the player’s inventory tab. Treating “Quest Items” and “regular items” as equivalent for turn-in purposes is fine in a small quest, but it is a source of bugs in larger quest lines, and it is one of the most common complaints in community bug reports. A more robust approach is to track the recovered item as a stage flag, then use the flag for the turn-in rather than the inventory. The quest still uses the item as a player-visible reward, but the underlying logic does not depend on the player’s inventory being in a particular state.
Comparison with neighboring Thieves Guild quests
Ahdarji’s Heirloom sits between two of the better-known Thieves Guild quests, the earlier “May the Best Thief Win” initiation quest and the later “The Informant” quest in the Imperial City. The table below is a quick comparison of the three quests across a few design dimensions that matter to a developer. It is meant to highlight how a single quest line can vary its mechanics without changing its underlying quest system, and how the choices made in Ahdarji’s Heirloom affect both the player’s experience and the developer’s maintenance cost.
Quest comparison table
| Quest | Region | Core mechanic | Quest item source | Known risk area |
|---|---|---|---|---|
| May the Best Thief Win | Imperial City | Race against a rival thief to a target | Fixed cell container | Rival NPC despawning if the player loses |
| Ahdarji’s Heirloom | Bravil and Leyawiin | Recover a stolen item via a prisoner | Alias on an arrested NPC | Quest item failing to spawn if scripts run in the wrong order |
| The Informant | Imperial City | Locate a missing contact and decide their fate | Script-generated on a dead NPC | Dialogue branch gating breaking if the NPC is killed out of order |
Player-side checklist for a clean run
For players who want a single low-risk path through the quest without diving into the scripting side, the checklist below is the one that the verified walkthrough and the wider community recommend. It is intentionally conservative: every step is one the quest expects, and no step relies on a script that is known to be flaky. The cost of being conservative is a slightly longer run, and the benefit is a quest that completes on the first attempt without needing to reload.
- Fence at least 200 gold through the regional fences before talking to S’Krivva for the first time.
- Travel to Leyawiin in the morning and find Ahdarji at her house, then start the conversation from a clean save.
- Talk to the Leyawiin beggars next, and pay the bribe that opens the dungeon door.
- Enter Castle Leyawiin through the main door, then descend to the dungeon rather than picking the dungeon door from outside.
- Find Amusei, open dialogue, let the conversation run to completion, then check the inventory.
- Leave the dungeon the same way you entered, save the game, then fast-travel to Bravil.
- Find S’Krivva at her usual location, make sure the ring is in a regular inventory slot rather than equipped, then turn in the quest.
- Wait for the reward dialogue to finish before opening the quest log, then check that the next special job is available.
Developer-side checklist for reusing the pattern
For developers who want to reuse the Ahdarji’s Heirloom pattern in their own quest, the list below covers the design and implementation work that the original quest implies. None of the items are large, but skipping any one of them tends to introduce a bug of the same shape as the ones in the original quest. The list is deliberately written in the order the work should be done, because the order is part of the pattern.
- Define the regional contact as a single named reference with a faction tag and a stage gate on its dialogue.
- Define the quest item as an alias on the NPC that holds it at the start of the quest, and force the alias to resolve before any script runs.
- Define the dungeon door as a separate reference with a script block that runs once when the player enters the cell.
- Define the beggar as a network rather than a single NPC, with at least one of them gated by a faction rank.
- Define the turn-in dialogue as a separate reference that checks both the quest stage and the inventory state.
- Add a recovery path for each known failure mode, and document the recovery in a comment on the quest.
- Test the quest out of order, including skipping the beggar, talking to the contact out of hours, and entering the dungeon before the dialogue has resolved.
- Document the safe path in a walkthrough that the player can read without opening the editor.
Frequently asked questions
How do I start Ahdarji’s Heirloom?
You start the quest by fencing at least 200 gold worth of stolen goods through any of the regional Thieves Guild fences, then traveling to Bravil and talking to S’Krivva. She is the regional Doyen for Bravil, and her “first special job” dialogue opens the quest on the player’s quest log.
Where do I find S’Krivva in Bravil?
S’Krivva is usually inside her house when the door is unlocked, and at the Lonely Suitor Lodge at midday. The quest uses her standard daily schedule, so she can be found in either of those two locations during her active hours.
Where do I find Ahdarji in Leyawiin?
Ahdarji is a Khajit with a three-slot daily schedule. In the morning she is in her house, at midday she is at the Five Claws Lodge, and in the evening she is at the Three Sisters Lodge. Any of the three locations works as long as you are inside her active schedule package.
What if the dungeon door in Castle Leyawiin is locked?
The most common cause is that the beggar dialogue has not yet resolved, so the override script on the dungeon door has not fired. Return to the beggar, complete that conversation, then re-enter the castle exterior to reload the cell. If the door is still locked, wait 24 in-game hours and try again.
Why is the ring missing from my inventory?
The ring is created by a script block that runs after the Amusei dialogue resolves. If the script fires before the alias on Amusei has resolved, the ring is placed on the dungeon floor or in a nearby container instead. Check those locations, and if the ring is not there, reload the most recent save before the conversation.
Can I pick the lock on the dungeon door instead of bribing the beggar?
Yes, but it is the path that most often triggers the script ordering bugs. The brute-force approach skips the beggar stage flag that the dungeon override script depends on, and it can leave the door locked even after the lock has been picked. The safer path is to pay the beggar and use the door the quest expects you to use.
What is the reward for completing Ahdarji’s Heirloom?
The reward is a modest gold payout, a small bump to Thieves Guild reputation, and the next special job in the Bravil regional arc. The ring itself is not kept by the player, and the quest moves it out of the inventory at the turn-in dialogue.
Does Ahdarji’s Heirloom have different stages in Oblivion Remastered?
The quest structure is the same in Oblivion Remastered as in the original release, but the verified page notes that the quest has been “updated and verified” for the remaster. The known risk areas are the same, and the safe path is the same, so a walkthrough written for the original release still applies.
Can I complete the quest without talking to the beggars?
Technically yes, because the dungeon door can be picked, but the quest is designed around the beggar conversation. Skipping the beggar stage means the dungeon override script does not fire, the dungeon door is locked by the default castle script, and the quest log is left in a state that does not match the player’s progress. The quest can be completed, but the recovery cost is higher than the time saved.
Is the ring used by any other quest?
The ring is a self-contained quest item and is not referenced by any other quest in the base game. It can be sold or stored after the quest is complete, but it has no other use, and the quest that produced it does not require it to be kept.
Practical next steps
For players, the practical next step after completing Ahdarji’s Heirloom is to check the next regional arc. S’Krivva will offer the next special job once the player has fenced another 200 gold through the regional fences, and the same pattern of dialogue, location, and item recovery will repeat, with a different regional contact and a different quest item. For developers, the practical next step is to lift the patterns from this quest into a small test project, then deliberately break the order in the test project and see which failure modes the system handles gracefully and which ones it does not. The results of that test will be much more useful than a generic best-practices list, and they will surface the same ordering bugs that the original quest has documented in its walkthrough.