Coastal Bonescape collectibles in Borderlands 4: full field guide
Coastal bonescape collectibles. A field-tested Borderlands 4 guide to every Coastal Bonescape collectible category, with route notes, prereqs, and the one
Coastal Bonescape collectibles in Borderlands 4
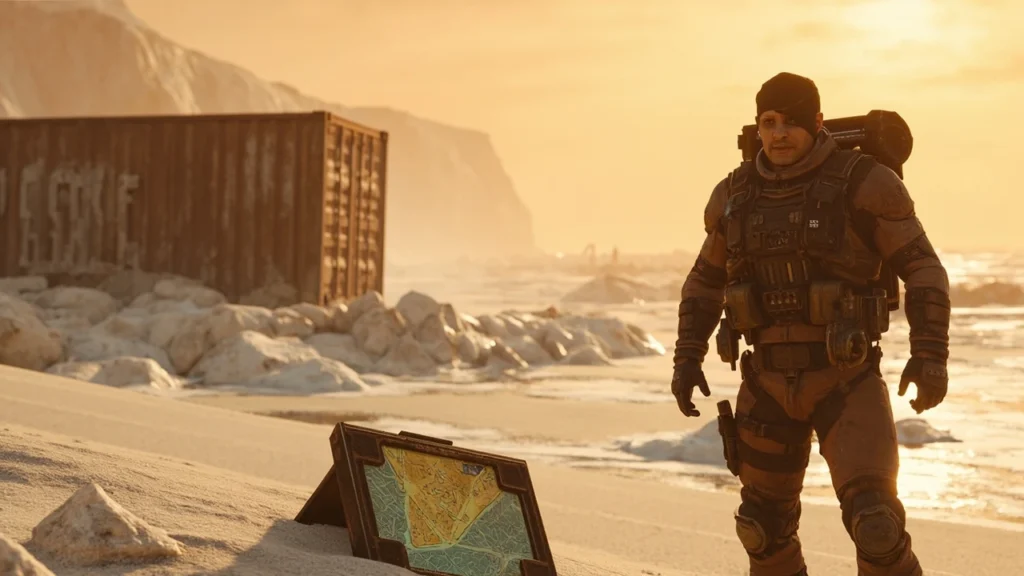
Borderlands 4 carves the planet Kairos into distinct biomes, and the Coastal Bonescape is one of the most densely packed zones for optional loot. Vault Hunters who sprint through the shoreline on the way to the next story checkpoint miss caches of cash, customization items, and lore documents that the rest of the campaign quietly assumes you already have. The zone is also a useful early test of route planning: collectibles are spread across tide pools, cliff ledges, and derelict structures, so a flat checklist will leave you circling the same rocks.
This guide treats the coastal bonescape collectibles as a route planning problem rather than a simple loot table. It covers what categories of pickups actually exist in the zone, the prerequisites that gate several of them, the order that prevents backtracking, and the safe way to verify progress so you do not have to replay the entire shoreline on a second character. One external reference page is used as the canonical checklist, and it is worth opening it alongside this page as you walk the coast.
What counts as a Coastal Bonescape collectible
Borderlands 4 splits optional pickups into several mechanical families. The same shoreline can hide items from every family at once, which is why a generic grab-everything loop is slower than a category-by-category sweep. Before you set foot on the sand, it helps to know what you are actually looking for, because each family uses a different visual cue, audio cue, or interface ping.
| Family | How it appears in the zone | What completing it does | Resets on reload |
|---|---|---|---|
| Cash and Eridium caches | Glowing loot containers near tide pools or wreck debris | Adds currency directly to the wallet | No, single pickup per character |
| Customization parts | Distinctive shells or fabric caches near cliff huts | Unlocks vehicle and ECHO skin options | No, single pickup per character |
| Lore documents and audio logs | Handhelds beside skeleton displays, sometimes on cliff perches | Fills the in-game codex and unlocks flavor dialogue | No, persistent |
| Vault symbol fragments | Glowing sigils on bone-shaped rock formations | Contributes to a zone-wide completion tracker | No, persistent |
| Side mission entry points | Dead drops, distress beacons, and small enemy camps | Adds a quest to the journal with its own reward | No, single completion per character |
Every Coastal Bonescape collectible on a checklist belongs to one of these families. The trick is that the visual signals overlap: a glowing loot container in a tide pool might be a cash cache, a lore handheld, or a Vault symbol fragment, and the only way to know which is to read the prompt or watch the ECHO ping color. Treat the family table above as a quick mental filter before you pick anything up.
Prerequisites before you walk the coast
Several pickups in the Coastal Bonescape are gated behind progression, equipment, or traversal abilities. If you arrive during the first visit that the story script sends you through the zone, a meaningful slice of the shoreline stays inaccessible until later. Confirming these prerequisites before you start saves a long second loop.
- Main story checkpoint. The story must trigger the Coastal Bonescape entry cutscene before any side content in the zone becomes active. Until that trigger fires, the journal hides the local side missions even if the markers are visible on the map.
- Traversal tool for cliffs. A double-jump or grapple tool is required for several cliffside caches and the upper lore document on the western headland. Without it, those items are physically unreachable.
- Vehicle with off-road tires. The southern dunes and the half-buried cargo crate require a vehicle. On foot you can reach the edges, but you will not be able to crack the larger caches or trigger the side mission that depends on them.
- Ammo vendor pass. A few side camps in the zone escalate into waves that exhaust standard ammo pools. Buy or craft one reserve stack of your preferred damage type before the route begins.
If any prerequisite is missing, finish the relevant story beat or craft the missing tool first. Picking up part of a checklist and returning later is fine, but trying to complete the coast without the double-jump costs more time than simply clearing the prerequisite.
Planning a route that does not double back
The Coastal Bonescape wraps around a single bay, but its collectibles are not arranged in a clean loop. The fastest character-tested route enters from the north, hugs the tide pools, cuts inland through the cliff village, and exits along the southern dunes. Going the other direction works too, but you will fight more elevation changes and lose access to two caches that only respawn while you are approaching from the north.
- Land at the northern waypoint and walk the tide pools clockwise. The cash caches here are all on the seaward side of the rocks, so stay below the high-water mark.
- Climb to the cliff village through the marked grapple point. The lore documents are deliberately placed near lookout positions, so approach each hut from above rather than along the trail.
- Cross the central plateau and clear the side mission camp. The camp unlocks a vendor and a fast travel point, both of which are useful on the second pass if you need one.
- Drop down the southern cliff face and sweep the dune caches with the vehicle. The half-buried cargo container sits behind a rock that only the off-road tires can clear at speed.
- Finish at the southern waypoint. If the tracker still shows missing items, fast travel back to the northern waypoint and re-walk the perimeter at a slower pace.
Walking the coast in this order keeps your elevation gain in one direction and your descent in one direction, which is the single biggest factor in total time. Most failed routes on the zone come from bouncing between the tide pools and the cliff village, because each crossing spends stamina and ammo without adding new items.
Category-by-category breakdown
Once the prerequisites are in place and the route is set, the actual sweep becomes a matter of watching for the right cue in each terrain type. The categories below are the ones that the zone actually populates, and the order matches the route above.
Tide pool cash and Eridium caches
The northern tide pools hold the densest cluster of currency caches. They look like ordinary loot containers, but the ECHO ping color is warmer than a standard pickup. Loot them in clockwise order so you do not cross your own trail, and save the larger container at the pool’s center for last; the smaller ones often drop ammo that you will burn when the larger cache triggers a small enemy wave.
Cliffside lore and audio logs
The cliff village has three lore documents and one audio log. Two of the documents sit on raised platforms that require a grapple or a double-jump from below. The audio log is a handheld on a corpse, and the prompt for it is shorter than usual; if you walk past it at normal pace you will miss the interaction window.
Vault symbol fragments
Vault symbol fragments glow on bone-shaped rock formations. There are five in the zone, and each is visible from a distance, so the tracker widget is the most reliable tool here. The southernmost fragment is the easiest to skip because it sits behind a rock that hides the glow until you are nearly on top of it.
Side mission entry points
Two side missions start in the Coastal Bonescape. One is a distress beacon near the southern dunes, and the other is a dead drop inside the cliff village. Both markers appear on the map once the main story checkpoint fires, but the distress beacon only spawns its target enemy after you loot a specific cash cache nearby. Clear the cache first, then approach the beacon.
Customization parts
Customization caches are the rarest family in the zone. There are only two, and both sit at the end of a small side trail. If you have already passed the trailhead, do not backtrack directly; finish the main loop and approach the trailhead from the opposite direction, which avoids retriggering enemy patrols.
Common failure modes and how to read them
Most of the questions that show up in comments after a Borderlands 4 collectible guide are not actually about the collectibles. They are about the tracker still showing missing items after a clean sweep, or about a side mission that refuses to trigger. Diagnosing those problems is faster than redoing the route.
| Symptom | Likely cause | How to confirm | Safe next step |
|---|---|---|---|
| Tracker shows one cash cache missing | Cached inside an enemy wave that you skipped | Reload the tide pool, let the wave spawn, clear it | Loot the dropped container and recheck the tracker |
| Distress beacon will not activate | Prerequisite cash cache not yet looted | Open the map and check the nearby cache marker | Clear the cache, return, interact again |
| Cliffside lore prompt does not appear | Approach vector too low; the document sits on a raised platform | Look for a grapple anchor or a jump pad | Climb to the platform from above rather than along the trail |
| Vehicle cache stays locked | Standard tires cannot cross the dune soft sand | Watch for the vehicle sinking into the dune | Switch to a vehicle with off-road tires and retry |
| Side mission refuses to credit | An optional objective inside the camp was skipped | Open the mission log and read the optional steps | Return to the camp, clear the optional step, then turn in |
Each row in this table corresponds to a real failure mode that wastes the most time on a second pass. If the symptom you are seeing is not listed, the next section on validation will help you confirm whether the pickup is actually missing or simply not registered yet.
Validating completion without a second walkthrough
The in-game tracker is reliable for families that have a fixed number of entries, like Vault symbol fragments, and less reliable for families that the game counts dynamically, like cash caches. The fastest validation pass uses the tracker as a coarse filter and a third-party checklist as the fine filter.
- Open the zone completion screen and look for any family that shows fewer than the expected total. The expected totals are stable across patches, so a missing entry is almost always a real miss rather than a tracker bug.
- Compare the tracker to a published checklist of coastal bonescape collectibles, which lists every pickup by terrain type and includes the cues that the tracker does not surface. Cross-referencing the two takes a few minutes and saves an entire second walk.
- For any family that the tracker says is complete, do a single visual sweep of the terrain type that hosts that family. Tide pool caches are the most common false positive, so they are worth the extra minute even when the tracker reads clean.
- If the tracker still shows a missing item after a visual sweep, fast travel to the nearest waypoint and reapproach the area from the opposite direction. Approaching from a different vector can re-trigger an enemy wave that holds a cached pickup.
Game8 maintains a dedicated page on Borderlands 4 collectibles that organizes the same families by zone, and it is a useful cross-check when the in-game tracker behaves inconsistently. The page lists each category, the count per zone, and the visual cues to look for, which makes it a faster second pass than replaying the entire shoreline. Treat the published checklist as a confirmation tool rather than a primary source, and always defer to the in-game tracker when the two disagree.
How the Coastal Bonescape fits into the wider Borderlands 4 route
The coastal bonescape collectibles are part of a larger optional content layer that spans every biome on Kairos. The same families recur in every zone, so the route planning pattern that works here also works in the other biomes: confirm prerequisites, walk the coast in one direction, validate with the tracker, and only then move to the next zone.
From a game production standpoint, this is a useful pattern to study. Optional content in Borderlands 4 is layered rather than gated, which means a player can pick up most of the collectibles in any zone during a single visit, but the last ten to fifteen percent always depends on a small prerequisite chain. The Coastal Bonescape is the cleanest example of that pattern because the zone is small enough to walk in one sitting, and the prerequisite chain is short enough to verify by eye.
If you are a developer reading this for design reference, the takeaway is that the category split above maps almost directly to a content authoring pipeline. Currency caches, customization parts, lore documents, Vault symbol fragments, and side mission entry points are all authored as separate content families, populated into the same zone, and surfaced through a single tracker. The user-facing checklist that the third-party page publishes is essentially a mirror of the authoring categories, which is why it stays accurate across patches even when the in-game tracker wording changes.
Frequently asked questions
How many Coastal Bonescape collectibles are there in total?
The total number depends on how you count families. If you count every family separately, the zone has roughly two dozen pickups across cash caches, customization parts, lore documents, Vault symbol fragments, and side mission entry points. The exact count shifts between patches, so always cross-check with the in-game tracker and a current external checklist rather than memorizing a number.
Do Coastal Bonescape collectibles respawn on reload or in new game plus?
Most do not respawn on a simple reload, because they are tied to character progress rather than to world state. New game plus and seasonal resets are the only systems that re-arm them, and even then the customization parts and lore documents usually stay completed because they are persistent unlocks.
Can I complete every Coastal Bonescape collectible on a single visit?
Yes, as long as the prerequisites are in place before you arrive. The main story must have fired the entry cutscene, and you must already have the traversal tool and a vehicle with off-road tires. Without those, two or three pickups will stay physically unreachable on the first visit.
Where is the missing cash cache that the tracker keeps showing?
In most reports it sits inside the tide pool that triggers a small enemy wave. If you cleared the wave from range, the container may have despawned before you looted it. Reload the tide pool, let the wave spawn at close range, and pick up the dropped container directly.
Why will the distress beacon near the southern dunes not activate?
It depends on a nearby cash cache. The cache must be looted first, because the beacon’s enemy target only spawns after the cache registers as collected. Clear the cache, walk back to the beacon, and the interaction prompt will appear.
Are the customization parts in the Coastal Bonescape shared across characters?
No, customization parts are per character. Each new Vault Hunter has to walk the zone and pick up the caches again to unlock the same vehicle and ECHO skin options. The customization itself unlocks in the account-wide library, but the pickup is still per character.
Do I need to finish the side missions to count the zone as complete?
The completion tracker counts side mission completion separately from the collectible families, so a fully looted zone can still show an incomplete tracker if the side missions are unfinished. Finish the two side missions that start in the zone before you move on, and the tracker will read clean.
What is the fastest way to recheck the zone if the tracker disagrees with a checklist?
Fast travel to the northern waypoint, re-walk the tide pools clockwise, climb the cliff village from the grapple anchor, and sweep the southern dunes with the vehicle. That sequence covers every family in the order the route above uses, and it takes roughly fifteen minutes if you do not stop to fight.
Does patch 1.01 change any Coastal Bonescape collectible locations?
Patch 1.01 did not move any collectibles in this zone, but it did adjust the spawn rules for the tide pool enemy wave. If you are playing on a recent build and the wave no longer spawns, fast travel away and back, and the spawn should reset to its original behavior.
Is there a way to track collectibles across multiple zones at once?
Yes, the in-game map has a filter that overlays every family at once, and the published Borderlands 4 checklist organizes the same families by zone. Use the map for live tracking during a run and the checklist for planning the next zone, and the two together remove the need to memorize any single route.