
Great Fairy locations in BotW: every fountain, cost, and upgrade path
Great fairy locations botw. Map of all great fairy locations in BotW, what each fountain costs, how armor upgrades scale by tier, and how to reach Cotera
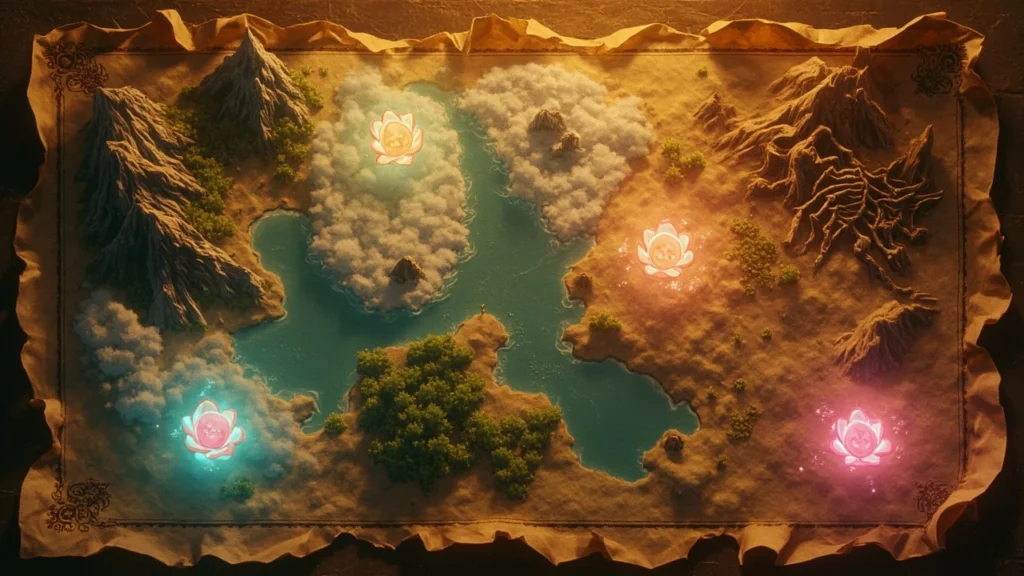
Great fairy locations BotW: the practical route through Hyrule
Every armor upgrade in The Legend of Zelda: Breath of the Wild runs through a closed orange flower bud tucked into a quiet corner of the map. Four great fairies run the fountains, and each one charges a different sum of rupees to break the seal. Because the cost is set by the order you find them rather than the fairy herself, a clear route through the great fairy locations in BotW saves both time and currency, especially if you intend to push a full armor set to its four-star ceiling.
This guide maps every flower bud, the price tier you can expect at each stop, the materials you will need once the fountain is open, and the practical travel notes for reaching each site. It also covers the bonus Horse God fountain at Lake Hylia, which uses the same closed-bud visual language but operates on a different mechanic.
How the four fountains fit together
Breath of the Wild places four great fairy fountains inside large closed orange flowers scattered across the regions of Hyrule. Each flower is surrounded by smaller pink fairies that respond to stealth, so a careful approach lets you stock up on single-restore fairies before you even speak to the great fairy. Inside the sealed bud, the fairy explains that she needs rupee power before she can fully manifest, and the size of the donation depends on the order in which you wake the fairies, not the fairy you happen to find first.
Once the seal breaks, the same rules apply everywhere: each great fairy upgrades your armor in exchange for the right combination of monster parts, gems, or elemental items, and the upgrade tier a fairy can reach scales with how many other great fairies you have already freed. The order in which you free them does not change that scaling; only the price you pay changes.
The four price tiers, in unlock order
- First fairy freed: asks for 100 rupees.
- Second fairy freed: asks for 500 rupees.
- Third fairy freed: asks for 1,000 rupees.
- Fourth fairy freed: asks for 10,000 rupees.
Because the cheapest option is always the first fairy you wake, players who want to spend the least on the full set of fountains should plan a route that lets them visit them in any order, since the order determines cost, not the fairy. The only hard requirement is having enough rupees in your wallet for the next payment on the list above.
Upgrade tiers you can reach at each fountain
Armor in BotW has up to four upgrade levels, shown as stars. Each great fairy can push any eligible armor set up to a star level that depends on how many great fairies you have freed so far.
| Great fairies freed | Maximum star level a fairy can apply | What the upgrade changes |
|---|---|---|
| 1 | First stat boost and small defense gain on the chosen piece. | |
| 2 | Second stat boost and a larger defense increase. | |
| 3 | Third stat boost, defense closer to the set cap. | |
| 4 | Final stat boost, full defense, and any set bonus effect enabled. |
All four fountains share these limits, so a single fairy can already take any piece to four stars once the rest of the network is open. That is why most players only visit a few fountains for story reasons and return to a convenient one to finish a set.
Great Fairy Cotera above Kakariko Village
Cotera is the easiest great fairy location in BotW to reach, and most players stumble onto it on the way to Kakariko Village. From the Ta’loh Naeg Shrine on the ridge above the village, head north past the shrine and follow the path into a clearing. The orange bud is hard to miss because of the cluster of torches that Hylian travelers keep lit nearby.
Cotera sits in the foothills of Mount Lanayru, which means the surrounding roads stay clear in nearly any weather. If you are still learning the basics of the game, Cotera is the natural first stop.
Travel notes for Cotera
- Closest shrine: Ta’loh Naeg, on the cliff path above Kakariko Village.
- Region: East Necluda, just south of the Lanayru range.
- Hazards: Light Keese at night, and Bokoblins on the road from Hateno.
- Stealth tip: Crouch and walk when collecting the small pink fairies that hover around the bud; a single horizontal slash with a melee weapon breaks the silence and scatters them.
Once inside, Cotera asks for the standard fee based on unlock order and then opens her fountain for upgrades. The interior mirrors the layout used by every other great fairy, so visiting Cotera is a good way to learn the upgrade interface before traveling to the harder fountains.
Great Fairy Kayasa near Tabantha Tower
Kayasa is the Tabantha great fairy, found in a cold stretch of the Hebra border. The fastest route starts at Tabantha Tower, which you can activate from the south. Once the tower is up, look south and slightly down for a large green bud on a rocky outcrop across the gap. Glide directly toward the flower; the drop is long enough that you may want a warm meal or the Snowquill set if you are still early in the game.
Kayasa’s fountain sits between Rito Village and the Hebra peaks, so it pairs naturally with the Rito main quest and the Vah Medoh divine beast route.
Travel notes for Kayasa
- Closest shrine: Sha Gehma, on the south side of the Tabantha region near the lake.
- Region: Tabantha, just south of the Rito village and west of the Hebra range.
- Hazards: Cold weather, ice on the ledges around the fountain, and a couple of White-Maned Moblins on the ridge west of the bud.
- Glide approach: Look for the green bud at the end of the long ridge when you stand on Tabantha Tower’s south balcony. Plan stamina accordingly.
Kayasa is a useful second stop if you are heading to Rito Village for the first time, because the cold-resistant armor sets you can buy in the village are exactly the kind that benefit from immediate upgrades.
Great Fairy Mija in the Akkala region
Mija lives in the far northeast, on the southeastern lip of a small Akkala lake. The classic approach is to climb Akkala Tower and look east, past Dah Hesho Shrine, until you see a grove of green, yellow, and orange trees hiding a large bud. Glide down toward the shrine, then follow the shoreline east to the fountain. The bright foliage makes the bud easier to spot than the surrounding terrain, but the lake is small enough that the path is short once you are on the ground.
Because Akkala is also home to the Lomei Labyrinth and the Tarrey Town plotline, Mija is a good waypoint when you are already in the area for those tasks.
Travel notes for Mija
- Closest shrine: Dah Hesho, on the eastern side of the Akkala lake.
- Region: Akkala, in the far northeast corner of the map.
- Hazards: Yiga Clan ambushes on the road from the Akkala Sea, and a few Lizalfos that patrol the shoreline.
- Alternate approach: Cross from the Akkala Sea by raft if the wind on the tower is working against your glide.
The Akkala tower marks the precise location once active, which makes Mija one of the more reliable great fairy locations in BotW for players who rely on map data rather than visual scouting.
Great Fairy Tera in the Gerudo desert
Tera is the most remote great fairy location in BotW. The fountain hides in the southwestern Gerudo desert, beneath a giant skeleton that doubles as the entry to both Hawa Kosh Shrine and the great fairy fountain itself. The sandstorm that shrouds the area disables your map markers, so navigating Tera requires either a heat-resistant loadout or a cold-resistant one, depending on the time of day, plus a Sand Seal or a sand-boots combo to cross the deep sand quickly.
Because the area is hostile, Tera is the place where planning a heat or cooling strategy actually pays off. The desert also harbors the Gerudo Town storyline, so most players visit Tera either as a dedicated upgrade run or as part of the Vah Naboris divine beast quest.
Travel notes for Tera
- Closest shrine: Hawa Kosh, hidden inside the same skeleton structure as the fountain.
- Region: Gerudo Desert, in the far southwest of the map.
- Hazards: Extreme heat by day, cold nights at higher elevations, Moldugas in the deep sand, and the loss of map markers inside the sandstorm.
- Recommended gear: Desert Voe set or a heat-resist elixir for daytime travel, and either the Snowquill set or a cold-resist meal for the cold half of the cycle.
Tera’s skeleton entry doubles as a stable visual landmark that you can hit from the air with the right glides, and the surrounding heat makes a Sand Seal rental at Gerudo Town the most efficient way to reach the site on a fresh save.
Planning the cheapest route through the four fountains
Because the price you pay depends on the order you free the fairies, you can save 9,900 rupees by reaching the cheapest tier on the fairy you actually need to wake first. The standard approach is to think of the great fairy locations in BotW as a tier list rather than a fixed path.
Suggested order for early rupees
- Great Fairy Cotera above Kakariko Village. Easiest access, cheapest first fee of 100 rupees.
- Great Fairy Kayasa near Tabantha Tower. Pairs with the Rito Village storyline and the Vah Medoh divine beast.
- Great Fairy Mija in the Akkala region. Pairs with Tarrey Town and the Lomei Labyrinth side quest.
- Great Fairy Tera in the Gerudo desert. The expensive last unlock, but you only pay 10,000 rupees once.
If you would rather pair fountains with story beats than save rupees, the order can flip freely. The cost is set by unlock order, not by the fairy or by story progress, and the upgrade tier each fairy can apply is identical once all four are freed.
Materials and upgrade planning once a fountain is open
Inside the fountain, the great fairy walks you through the upgrade interface. Each armor piece has a list of materials whose count and type scale with the upgrade level you are buying. Tier one and two upgrades tend to use low-tier monster parts, while tier three and four ask for rarer items like Lynel horns, dragon parts, or star fragments.
Useful materials to keep in storage
- Bokoblin horns, Moblin horns, and Lizalfos tails for early upgrades.
- Keese eyeballs and Hinox guts for mid-tier set pieces.
- Lynel hooves, horns, and guts for the tier three push.
- Dragon horns, fang, or scales, and star fragments, for tier four upgrades on premium sets.
- ChuChu jellies in each elemental type for the elemental armor sets that need them.
Many of those materials overlap with cooking recipes, so a quick inventory pass before visiting a fountain saves a long run back to a stable. Upgrading at a fountain only consumes the listed materials; the rupees you paid to open the fountain are a one-time fee per fairy and do not reappear on the upgrade screen.
What to upgrade first
If you are still early in the game, prioritize the armor set that matches the next region’s climate, because climate protection is the difference between dying in one hit and walking through an area without chugging elixirs. Once the climate sets are handled, the Climbing, Soldier, and Ancient sets give the largest combat return for the materials you already have. Sets that only matter in specific fights, like the Phantom or Radiant sets, can wait until the end of the run.
Great fairy locations BotW versus the Horse God fountain
Lake Hylia hides a second closed-bud fountain south of Highland Stable, where a road curves back across a small bridge. The resident is Malanya, the Horse God, and the location is easy to confuse with a great fairy fountain because the bud is the same shape. The mechanics, however, are different.
| Feature | Great fairy fountains | Malanya, the Horse God |
|---|---|---|
| Number of fountains | Four | One |
| Cost to open | 100 to 10,000 rupees, scaled by unlock order | Flat fee of 1,000 rupees, independent of the great fairy network |
| Service offered | Armor upgrades using monster parts, gems, and elemental items | Resurrection of dead registered horses, including rare mounts |
| Network scaling | Upgrade tier grows with the number of fairies freed | No scaling from the great fairy network |
| Best time to visit | Whenever you have rupees and the right materials | After registering a horse that later dies |
Visually the two are similar, but functionally Malanya is a stable-side service rather than a combat upgrade path. Treat Malanya as a side trip from Highland Stable rather than part of the great fairy upgrade plan.
Reset behavior and what happens if a fairy dies
The great fairies themselves do not respawn in the normal enemy sense because they are unique NPCs, not monster camps. Once freed, they stay in the fountain for the rest of the playthrough and can be revisited as often as you like. The only thing that resets is the standard Blood Moon cycle, and that cycle does not affect the fountains.
The pink fairies that hover around each bud respawn after a Blood Moon, which matters for players who want a steady supply of single-restore fairies. Catching them is best done by sneaking up from behind and grabbing them in slow motion, then pocketing them from the quick menu. If you break the silence, they scatter, but they will return on the next Blood Moon.
Common mistakes to avoid when chasing the fountains
Most wasted rupees on this quest come from one of three errors: paying the most expensive tier first, arriving at a fountain without enough rupees, or showing up without the materials for the upgrade you actually want.
Quick checklist before each visit
- Check your rupee count and stop at the fairy whose unlock tier matches what you can afford.
- Pre-stage upgrade materials in your inventory so you can walk out of the fountain with at least one tier raised.
- Carry a warm or heat-resistant loadout for Kayasa, and a heat plus cold strategy for Tera.
- Plan a glide path from the nearest tower for Kayasa, Mija, and Tera, because the bud is often easier to see from above than from the ground.
- Save the activation of a tower until you are ready to glide, so the wind direction on the platform still favors your route.
Following that checklist turns the four great fairy locations in BotW from a long treasure hunt into a clean three-visit side quest, with the optional Tera stop as the final unlock.
How the fountain network supports a single set
A practical reason to care about the network is that one fairy, after all four are freed, can take a single armor set from zero stars to four stars in one sitting if you bring the materials. That means you only need to visit a single fountain in person once the network is open, which is the typical endgame pattern: open the fountains as you go, then return to whichever fountain sits next to your next activity for the rest of the game.
This is also why the great fairy locations in BotW often become travel anchors. The four fountains are spaced around the cardinal regions of the map, and the upgrade interface is the same at each, so they function as armor-stations that double as fast-travel-adjacent landmarks.
Frequently asked questions
How many great fairies are there in BotW?
There are four great fairy fountains in Breath of the Wild: Cotera above Kakariko Village, Kayasa in Tabantha, Mija in Akkala, and Tera in the Gerudo desert. Each fountain is sealed inside a large closed orange bud and opens after a one-time rupee payment. The Horse God at Lake Hylia shares the same visual style but is a separate NPC with a different service.
What is the cheapest way to unlock all great fairy locations in BotW?
The first fairy you free costs 100 rupees, the second costs 500, the third costs 1,000, and the fourth costs 10,000 rupees. Because the cost is tied to the order you free them and not the fairy, you can pay the cheapest total simply by being willing to visit any fountain first. Most players start with Cotera because the path above Kakariko Village is short and safe.
Do great fairy upgrades share tiers between fountains?
Yes. The highest star level a fairy can apply depends on how many great fairies you have freed in total, and the order in which you free them does not change that ceiling. A single fairy can take a piece to four stars once the full network is open, which is why most players only visit a few fountains for the quest and return to a convenient one to finish a set.
Which fountain should I visit first?
Cotera, the great fairy above Kakariko Village, is the easiest first stop because the Ta’loh Naeg Shrine is close and the road is well-traveled. Choosing Cotera first also pays the cheapest fee. Kayasa, Mija, and Tera are equally valid as a first stop, but they require more travel or climate protection.
Can I reach the Gerudo fountain without a Sand Seal?
Yes, but the trip is much longer. You can walk or paraglide to the giant skeleton, but the deep sand slows you down and the sandstorm can disable your map markers. A Sand Seal rented at Gerudo Town or the sand-boots effect from the Gerudo set speeds the trip considerably and is the standard approach for a first visit.
Do the pink fairies around each bud respawn?
The small pink fairies around each bud respawn after every Blood Moon, which is the same reset cycle that revives most enemies. Catching them is best done with a silent approach, because a melee swing scatters them for the rest of the cycle. The great fairy inside the bud does not respawn; once freed, she stays in her fountain.
Is the Horse God fountain the same as a great fairy fountain?
No. The Horse God, Malanya, lives in a similar closed bud south of Highland Stable, but the service is different. She resurrects dead registered horses, including rare mounts, for a flat fee of 1,000 rupees, and her price is not tied to the great fairy unlock order. She does not upgrade armor.
What should I upgrade first once a fountain is open?
Prioritize the armor set that matches the next region you plan to explore, because climate protection removes the need to cook elixirs every few minutes. After climate sets, the Climbing, Soldier, and Ancient sets offer strong general combat returns, while boss-themed sets like the Phantom or Radiant sets can wait until you have the materials for their top tier.
Do upgrades cost rupees after the fountain is open?
No. The rupee fee is paid only once, at the moment you break the seal on the bud. The upgrades themselves cost materials such as monster parts, gems, or elemental items, but no additional rupees. This is why players often visit a fountain immediately after paying the unlock fee to push at least one piece a star or two before moving on.
Can I skip a fountain and still reach four stars on a set?
Skipping a fountain only delays the four-star tier that fountain can apply to your armor. Once you have freed all four great fairies, any one of them can push a piece to four stars, so skipping a fountain during the story does not lock you out of the final upgrade tier later. It only means you will be limited to a lower star level until the rest of the network is open.


