Sanctum of Temperance in Crimson Desert: location, quest, and rewards
Sanctum of temperance crimson desert. Find the Sanctum of Temperance in Crimson Desert: how to reach it, what quest starts there, rewards, and tips for the
Sanctum of Temperance in Crimson Desert: a practical walkthrough
Reaching the Sanctum of Temperance in Crimson Desert usually means a long ride across open plateaus, a careful climb up a hand-cut stone stair, and a short puzzle or fight at the shrine entrance. Players who arrive undergeared tend to bounce off the encounter, while players who clear the surrounding camps first can finish the location in one focused run. The page below covers how to find the sanctum, what triggers the associated quest, the enemies you should expect, the reward bundle, and the most common mistakes that waste time on the approach. Everything here is written for a first playthrough on a normal difficulty setting, and notes where late-game characters should behave differently.
Crimson Desert is a single-player open-world action game from Pearl Abyss built on the same engine lineage as Black Desert Online, and the Sanctum of Temperance sits in the kind of mid-game plateau region where the developers expect players to start engaging with the world’s optional shrines. Knowing what to bring, what to ignore, and which dialogue choices change the outcome is more useful than memorizing the exact coordinates, so the guide is organized around decisions rather than a turn-by-turn route.
Where the Sanctum of Temperance sits on the world map
The Sanctum of Temperance is in the northern half of the Pailune region, set into a low mesa roughly between the Crimson Canyon crossing and the outer farms that ring the central town. On the in-game map it is marked as a small shrine icon, but the icon only appears after the player has either walked within a set distance of the stair or has completed the prerequisite rumor that unlocks the related quest. Until one of those triggers fires, the same location reads as a generic terrain feature.
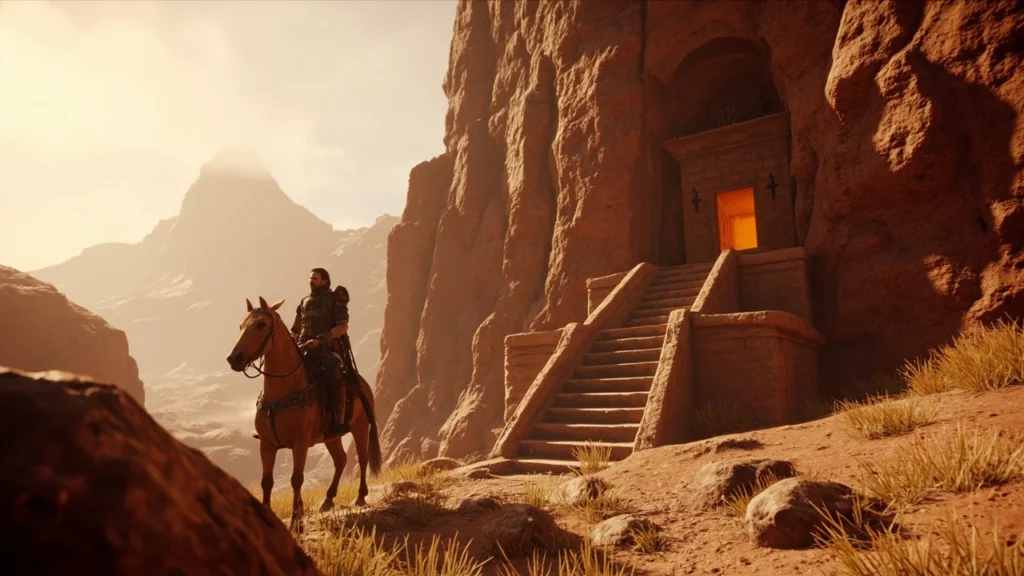
The fastest approach for most players is to fast travel to the Crimson Canyon waystation, ride north along the cliff road, and cut west at the first dry creek bed. The stair is visible from roughly two hundred meters out because the shrine’s entrance stone is a slightly different color than the surrounding cliff, but the path that leads to it is intentionally narrow. Riders who try to push their horse all the way up the stair will be forced to dismount near the base, so it is worth planning the dismount rather than scrambling at the last moment.
For players running the area on a second or third character, the same approach works, but it is worth noting that the enemies around the stair respawn on a different timer than the rest of the region. Coming back at night, in particular, swaps the daytime bandits for a smaller group of heavier units that prefer close combat, which is useful to know if you intend to clear the location more than once.
Prerequisites before you climb the stair
There is no hard level gate on the Sanctum of Temperance, but a few soft requirements tend to make the difference between a clean clear and a frustrating reset. The list below covers what most players need before they walk up that stone stair without burning through their healing stock.
- Stamina on the horse is high enough to reach the canyon waystation without stopping; if you arrive with the horse already winded, the extra sprint to the stair feels much longer than it is.
- A reliable ranged weapon with at least forty arrows or bolts. The approach is crossable on foot, but the shrine entrance has a few elevated positions that are best handled from a distance.
- One full stack of healing consumables plus one stack of buff food. The encounter is short, but the elites hit hard if you let them close together.
- A repair kit for armor and a sharpening stone for melee weapons. A broken weapon at the top of the stair is a common reason runs fail.
- Empty inventory space of at least six slots. Several reward items are unique and cannot be stored in the bank, so you need room when you finish.
If you are missing one of these, the area is still completable, but you should expect to spend more time on the approach. Players who travel light and rely on dodging rather than trading hits will get the most out of the encounter, since the elites telegraph their heavy attacks with enough windup to sidestep.
How to unlock the Sanctum of Temperance quest
The Sanctum of Temperance is tied to a short quest chain that starts in the central town of the region, not at the shrine itself. Talking to a refugee NPC near the inn is the most reliable trigger, because that NPC is the only one who mentions the shrine by name in their dialogue. Other travelers in the same tavern reference the stair in passing, but they do not start the quest; they simply mark the location as interesting on the map.
Once the NPC has explained what is happening at the shrine, the player is asked to clear the bandit camp that blocks the supply road and then to investigate the shrine entrance. Both steps are part of a single quest entry, so the player is not expected to abandon the quest and pick it up again. The reward is granted at the end of the shrine encounter, not when the bandit camp falls, which means the camp is a soft prerequisite and the stair is the real objective.
If you have already cleared the bandit camp on an earlier visit and forgot to talk to the NPC, the quest still starts cleanly, but the bandit step is automatically marked complete. This is one of the nicer design choices in the area, because it lets players who explored organically still get the full reward without replaying fights.
Step-by-step walkthrough of the shrine encounter
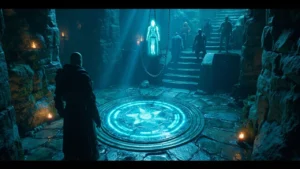
When you reach the top of the stair, the shrine is a small stone chamber with a central altar and three side rooms. The encounter plays out the same way on every visit unless you have already finished the associated quest, in which case the chamber is empty and the reward chest is open. The table below summarizes the three rooms, what is in them, and how to handle the most common threats.
| Room | Main threat | Recommended tactic | Risk if rushed |
|---|---|---|---|
| Left chamber | Two rangers on the upper walkway | Use the broken pillar as cover and pick them off with a bow before crossing the threshold | Arrows from above stagger the player and often knock them off the stair landing |
| Central altar room | One elite guardian with a halberd | Circle-strafe around the altar, wait for the overhead swing, punish the recovery | The elite has a shockwave follow-up that hits anyone standing directly in front of it |
| Right chamber | Trapped floor with pressure plates | Walk along the wall and disarm plates one at a time using a thrown stone | Triggering all three plates summons a small reinforcement group |
The encounter is designed to reward players who read the room rather than who button-mash. The rangers can be skipped entirely if you jump from the broken pillar to the central altar without entering the left chamber, but doing so skips the small loot chest tucked behind the upper walkway, so most players prefer to clear the room on the first visit and ignore it on subsequent runs. To clarify the background to Crimson Desert, the Wikipedia article offers a concise reference.
When the central elite falls, the altar activates and a short cutscene plays. The cutscene is the same on every character, so players who are repeating the location for a different reward can skip it without losing anything. After the cutscene, the reward chest spawns in front of the altar, and the quest updates to “Return to the refugee in town.”
Rewards, loot table, and what is worth keeping
The Sanctum of Temperance grants a fixed reward bundle the first time it is cleared, plus a small randomized roll on every subsequent visit. The fixed bundle includes a unique charm, a small amount of currency, and a crafting material that ties into the late-game upgrade path. The randomized roll is drawn from a small pool, so players who run the location more than once should not expect a different unique every time.
| Reward | Type | First clear | Subsequent clears | Notes |
|---|---|---|---|---|
| Charm of Temperance | Accessory | Always | Never | Reduces the duration of one specific debuff; the debuff it covers is listed in the charm’s tooltip |
| Silver | Currency | Always | Always | Amount scales with character level, not with the number of clears |
| Refined Stone of Mend | Crafting material | Always | 1–3, random | Used in a late-game upgrade that requires a total of eight stones across the region |
| Sanctum Reliquary | Trade good | Never | 25% chance | Sold to a specific vendor for a small amount of silver and one reputation point |
| Shrine Token | Currency | Never | Always | Spent at a regional vendor for cosmetic items and a small buff potion |
The charm is the only reward that is genuinely worth planning around. It is the only accessory in the early-to-mid game that mitigates a specific debuff without trading off another stat line, and it remains useful well into the late game. The other rewards are nice to have, but none of them are required for any single quest line, so the location is best treated as a one-time clear on the way to other objectives rather than a farming target.
Common mistakes that turn a clean clear into a reset
Most failed runs at the Sanctum of Temperance are not caused by the encounter being too hard. They are caused by small preparation problems that compound once the player reaches the top of the stair. The list below covers the mistakes that show up most often in community reports, in roughly the order they tend to happen.
- Riding the horse all the way up the stair. The mount gets stuck on the first landing and the player has to dismount in a bad position, often with arrows already incoming.
- Ignoring the bandit camp on the supply road. The camp respawns on a short timer, and leaving it alive means arrows fly into your back during the elite fight at the altar.
- Sprinting through the left chamber instead of clearing the rangers. The rangers do not despawn when you move on, so they pepper the central fight for the rest of the encounter.
- Standing directly in front of the elite for its shockwave. The shockwave is telegraphed by a brief glow on the floor, but the timing is tight if you are still recovering from a previous swing.
- Walking across the trapped floor in the right chamber. The pressure plates are easy to miss in the darker lighting, and triggering them summons reinforcements that pull the elite back into the room.
- Forgetting the repair kit. The halberd elite’s heavy hits chew through armor durability, and a broken chest piece doubles the damage you take from the rangers’ follow-up shots.
If you avoid the first three mistakes, the encounter is short and forgiving. The last three are the ones that tend to bite players who are overleveled and overconfident, because the area is tuned for a careful approach rather than a face-tank.
How the sanctum fits into the wider region
The Pailune region has three named shrines in total, and the Sanctum of Temperance is the second in the order the developers expect most players to find. The other two shrines focus on different mechanics, and clearing all three unlocks a small reputation bonus with the regional faction. None of the shrines are required to finish the main story, but the reputation bonus is worth picking up if you are planning to spend more than a few hours in the area, because it reduces vendor prices by a small but noticeable margin.
Players who want to clear all three shrines in a single loop should start at the eastern shrine, ride west to the Sanctum of Temperance, and finish at the northern shrine near the canyon wall. The loop is roughly a twenty-minute ride at a normal pace, and the enemies along the way are light enough that you can clear them as you pass without breaking the route. Doing the loop in the opposite direction is also fine, but it forces you to climb two stairs in a row without a rest, which is more punishing on the horse’s stamina.
The shrine also has a small role in one of the region’s side stories, where a different NPC asks the player to investigate why the bandits have been gathering near the stair. That side story is unrelated to the main quest, but it pays out a small amount of silver and a piece of dialogue that hints at the late-game story direction. It is not required reading, but it is one of the better-written bits of flavor in the area, and it is worth a quick visit if you are already in the region.
Tips for different character builds
The encounter is balanced around a mid-game character with a mix of melee and ranged tools, but it can be cleared cleanly with most builds as long as you adjust your approach. The list below summarizes how three common build archetypes tend to handle the location, and where each one tends to struggle.
- Melee-focused builds do well in the central room but should clear the left chamber with thrown weapons or a secondary ranged tool. Pure melee players often take unnecessary damage from the rangers if they try to close the distance on foot.
- Ranged-focused builds can skip the central elite entirely by kiting it around the altar, but the trapped floor in the right chamber is harder for them, because the disarm trick relies on a thrown stone rather than an arrow.
- Hybrid builds with a summoned companion have the easiest clear, because the companion soaks the elite’s shockwave while the player deals with the rangers. The companion does not, however, trigger the trapped floor, so the player still has to disarm the plates manually.
For players running a stealth build, the encounter is technically skippable from the broken pillar to the altar, but the reward chest is locked behind the elite’s death, so stealth alone does not finish the quest. Stealth is most useful for clearing the left chamber without alerting the rangers, which is a small but reliable time save on repeated runs. For an independent view of crimson desert review, the verified article adds source-specific context to this discussion.
What to do after you finish the shrine
Once the quest is complete, the refugee NPC in town offers a short follow-up dialogue that does not unlock new objectives but does mark the next shrine on the map. From there, the natural next step is to clear the bandit camp that you bypassed on the way in, because the camp is the only nearby source of the late-game upgrade material that the Sanctum of Temperance also drops. Clearing both in the same session is the most efficient use of the area, and it sets up a clean fast travel loop for future visits.
Players who want to push further into the late game should also pick up the regional faction’s reputation track at this point, because the next region’s content assumes a small but visible amount of reputation with this faction. The Sanctum of Temperance contributes one point of reputation on the first clear and an additional point for each subsequent clear, so it is a reliable way to push the track forward without grinding the more demanding faction quests.
Finally, it is worth double-checking your storage before leaving town. The charm is unique and cannot be stored in the bank, so if you are running alts you will need to either keep it on your main or pass it through a shared stash that supports unique items. The other rewards stack normally and can be banked without trouble.
Troubleshooting edge cases
A few specific situations are worth calling out separately, because they come up often enough in community posts that a careful editor should mention them. None of them are bugs, but they look like bugs at first glance, and the difference between a reset and a clean clear often comes down to knowing that the situation is handled by the game.
If the elite guardian does not spawn, the most common cause is that the player has already triggered the cutscene earlier and the encounter has reset to a passive state. Leaving the area and returning through the stair resets the encounter, but the elite will not respawn if any NPCs in the central altar room are already dead, so the cleanest fix is to fast travel away and back, then re-enter the chamber from the left side.
If the reward chest is empty, it usually means the player has already opened it on a previous visit and the randomized roll has not refreshed. The chest refills on the same timer as the rest of the region, so the simplest fix is to wait out the timer or to clear the bandit camp, which is on a longer timer than the shrine itself and forces the regional reset when it respawns.
If the quest marker disappears after the cutscene, the player is on the “Return to the refugee in town” step, which uses a different marker icon than the “Investigate the shrine” step. The objective is the same, and the marker is visible on the map, but it does not point to the stair any more. This is by design and does not indicate a soft lock.
If the player is on a second character and the charm does not appear in the reward chest, the most likely cause is that the charm is account-bound and has already been collected on the first character. The other rewards still drop, but the charm is a one-time-per-account item. Players who want to test the charm on a different build should transfer it through a shared stash that supports unique items before starting the second character’s run.
How the Sanctum of Temperance compares to the other regional shrines
The three regional shrines share a common visual language, but their encounters are tuned differently. The table below compares the three locations on the dimensions that matter most for planning a route, so that players can decide whether to clear them in one loop or to spread them across multiple sessions.
| Shrine | Main mechanic | Recommended level | Reward type | Time to clear |
|---|---|---|---|---|
| Eastern shrine (Sanctum of Patience) | Stealth-focused, no elite | Any | Crafting material plus a small charm | 10–12 minutes |
| Sanctum of Temperance | Hybrid combat and traps | Mid-game | Unique charm plus randomized loot | 18–22 minutes |
| Northern shrine (Sanctum of Resolve) | Heavy combat, two elites | Late-mid-game | Weapon upgrade plus a reputation point | 28–35 minutes |
The Sanctum of Temperance is the middle option in both difficulty and reward value, which is why it is the one most players remember clearly. The eastern shrine is forgiving and quick, and the northern shrine is the hardest of the three, but the middle shrine is where the developers first start asking the player to combine multiple tools in a single encounter. Players who are learning the region’s combat rhythm often find that clearing the middle shrine after the eastern one is the cleanest way to build up to the northern shrine without burning out.
For a broader look at how the wider game treats open-world shrine design, the official background on the game’s structure is summarized in the [Crimson Desert Wikipedia entry](https://en.wikipedia.org/wiki/Crimson_Desert), which describes the regions, the engine lineage, and the way the developers frame optional content. Independent reviewers have also covered how the shrines land in practice, including in the [crimson desert review from Press Start](https://press-start.com.au/reviews/ps5-reviews/2026/03/19/crimson-desert-review-mostly-worth-the-wait/), which treats the middle-game shrine loop as a useful test of whether the player enjoys the game’s pacing.
Frequently asked questions
Do I need to clear the bandit camp before the Sanctum of Temperance?
The bandit camp is not a hard requirement, but it is a soft one. Leaving the camp alive means the bandits will pepper the stair with arrows during the elite fight, which adds a layer of chaos that most players would rather avoid. If you are overleveled or running a build that can ignore the arrows, the camp can be left for later, but the cleanest clear is to take the camp down first.
Can the Sanctum of Temperance be cleared solo on a first playthrough?
Yes. The encounter is tuned for solo play, and the developers have not added a multiplayer variant for this shrine. A second player in the area does not change the encounter, because the elites are balanced around a single character’s damage output. Players who want a co-op experience can still help each other, but the rewards are not duplicated.
What level should I be for the Sanctum of Temperance?
There is no hard level gate, but a character who has finished the regional main story quests is comfortably within the recommended range. Players who try to clear the shrine before finishing the regional story tend to struggle with the elite’s shockwave, because their weapons do not yet have the stagger to interrupt the follow-up.
Does the charm from the Sanctum of Temperance stack with other accessories?
Yes. The charm occupies a normal accessory slot, and it stacks with other accessories in the same way as any other charm in the game. The debuff it covers is unique to this accessory, so there is no overlap with similar items from the other regional shrines. The only exception is the late-game accessory that covers the same debuff, which is a straight upgrade and which the charm is best treated as a stepping stone toward.
Is there a way to skip the central elite entirely?
No. The reward chest is locked behind the elite’s death, and the cutscene does not trigger until the elite is down. Players who try to jump from the broken pillar straight to the chest will find the chest locked and the elite still waiting. Skipping the elite also fails the quest, because the “Return to the refugee in town” step does not unlock until the cutscene plays.
What happens if I die at the top of the stair?
The encounter resets to the entrance of the left chamber, and the elite returns to full health. The player keeps any loot they have already picked up from the rangers, but the reward chest is locked again until the elite is down. There is no equipment durability loss on death in this area, so the cost of a reset is mostly the time spent climbing the stair again.
Can the Sanctum of Temperance be farmed for silver?
Technically yes, but the silver reward scales with character level rather than with the number of clears, so the per-run value drops off sharply after the first few visits. Players who want a reliable silver farm are better off running the bandit camp on the supply road, which has a shorter respawn timer and a more predictable silver payout. The shrine is best treated as a one-time clear for the charm, with occasional revisits for the randomized rewards.
Is the Sanctum of Temperance affected by the day-night cycle?
Yes, but only on the approach. The shrine interior does not change between day and night, but the enemies on the stair swap to a heavier group at night, which is worth knowing if you are planning a stealthy run. The simplest workaround is to clear the stair during the day and then enter the shrine after the day-night transition, since the interior timers are independent of the outdoor ones.
Does the Sanctum of Temperance quest have multiple endings?
No. The quest has a single ending that is the same for every character, and there are no dialogue choices that change the outcome. The refugee NPC’s follow-up dialogue varies slightly depending on whether the player has finished the related side story, but the variation is flavor text rather than a branching outcome.
Are the rewards from the Sanctum of Temperance shared across characters?
The charm is account-bound and only drops once per account. The other rewards, including the silver and the crafting material, are character-bound and drop on every clear for the character that completes the quest. Players who want the charm on a different character need to transfer it through a shared stash that supports unique items, because the charm cannot be re-earned on the same account.