Photoshop Smoke Overlay: The Guide for Beginners

Learn How to Make the Professional Photoshop Smoke Overlay
If you want to add depth, texture, and creative perspective to your image with the most popular photo editing software, consider adding Photoshop smoke overlay. The following expert guide will show you how to add this awesome effect to your project with basic Photoshop tools and beginner skills.
Understanding Photoshop Smoke Overlay: Definition and Purpose
What is a smoke overlay Photoshop effect? It is a semi-transparent image file of fog and/or smoke produced by fire (in most cases in PNG). Overlaying over an original Photoshop image this PNG file alters the original photo by adding the smoke effect element. Graphic/web designers, digital artists, and photographers, commonly apply the Photoshop smoke overlay technique. Making such mesmerizing overlays for your photos, digital art, or stock images assists in adding more depth and mood.
The most advantageous thing – most free smoke overlay Photoshop files are created from real, human-made photos. That is why they do not look fake. Mostly, you just choose between real photos depicting the smoke effect picking the most preferable color, density, and placement of the smoke in the photo.

Where To Get Awesome Smoke Overlay Photoshop Free?
If you need to find a nice-looking smoke overlay Photoshop free, you need to visit websites like Unsplash, Pexels, Pixabay, etc. These resources include hundreds of royalty-free, high-resolution images, including copyright-free smoke photos. You can download them free, no charges, though some images may cost money. Opt for the smoke image with a black background.
In addition, some graphic designers and artists share free images of custom-made smoke textures. Just make sure to get these images and clarify the license issue.
Another important piece of advice – most free smoke overlay Photoshop images are available for download in the most popular format of JPG. This format is compatible with the Photoshop application (from version 4.0 and higher). However, you may also use the images in RAW format. The Photoshop smoke overlay images are also compatible with Mac and Windows versions of this app.
How to Add Smoke Overlay in Photoshop: 3 Effective Methods
Method 1: Overlays
1) Open the base image. Then find the previously downloaded free smoke overlay Photoshop image on your PC – File 🡪 Place Embedded. Select the required image and choose “Place”;
2) Overlay the smoke image on the top of the base image;
3) Click the Transform Tool, and hover the mouse outside the transform box to rotate the overlay. Drag the overlay to the side with the double arrow;
4) Resize the smoke overlay Photoshop image – just click on any corner point and drag the layer. To confirm the resize, push Button;
5) Using the Layers Panel, click the Blend Mode. Alter the mode to Lighten/Screen – just play with what looks good for your Photoshop smoke overlay. At this point, the overlay should blend into the image;
Optionally, you may also reduce the intense smoke effect. Reduce the Opacity setting by dragging down the slider from the Layer Panel. Apply the Layer Mask to alter the edges of the smoke effect. Do not forget to set the Foreground color to black, adjust the Opacity, and brush over the areas you want to remove or reduce.
Method 2: Brushes
- First, you are required to find and download free smoke overlay Photoshop images and customized brushes for this application;
- After downloading, you should pick the default or customized brush – the Brush Tool (B) and then launch the brush tip preset from this panel;
- If you need to download the custom brush from your PC, find and click the icon that looks like a gear. Select the option Import Brushes. Locate the desired brushes from your PC, select and Open the required custom brush;
- Set up the Foreground color to white. Add a New Layer from the Layer Panel – just find and click the button Create A New Layer;
- Use the Stamp tool to stamp a customized stroke to the image. Do not forget to pick the required size. Click over the image by creating a smoke overlay Photoshop effect;
- It is possible to combine many brushes with various settings of Opacity and other effects;
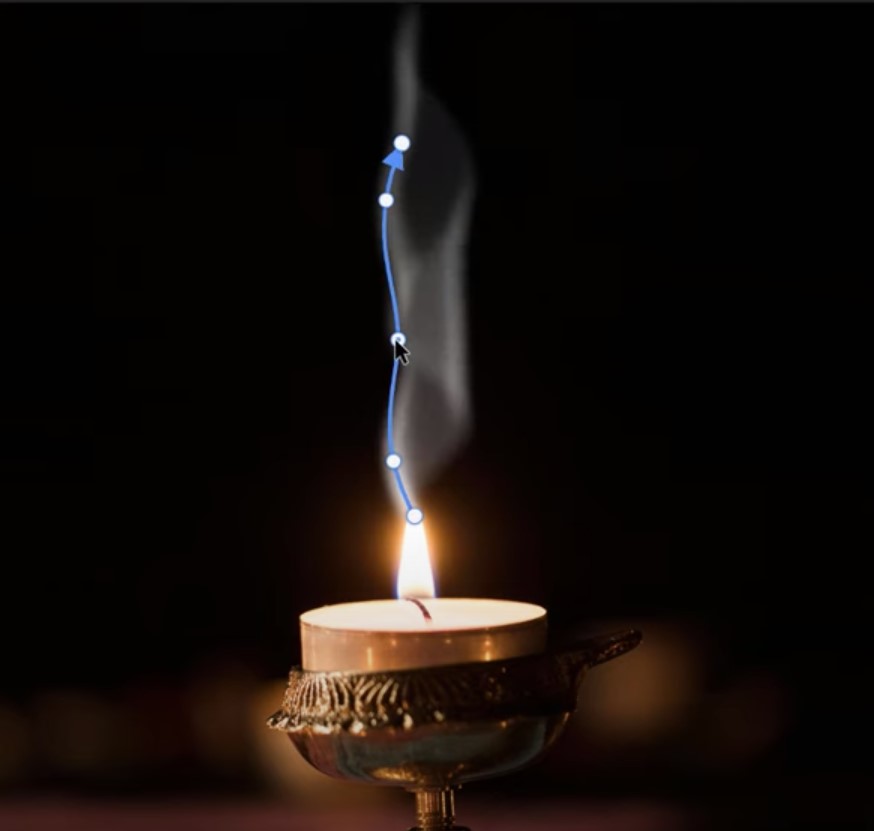
- To form the smoke’s shape and direction, use the setting of Transform Mesh. In such a way, you may merge a few layers for the brushstrokes. Use the Transform Tool and then the Warp Tool. Within the grid, transform the shape of the smoke overlay – add more squares to the grid from the Options Bar;
- Optionally, you may adjust the settings of Opacity and Fill until you get the desired Photoshop smoke overlay effect;
Method 3: Photoshop Smoke Overlay From Scratch
- Create a New Layer button from the Layer’s Panel;
- Choose the Brush Tool from the Toolbar;
- The Foreground Color has to be changed to white;
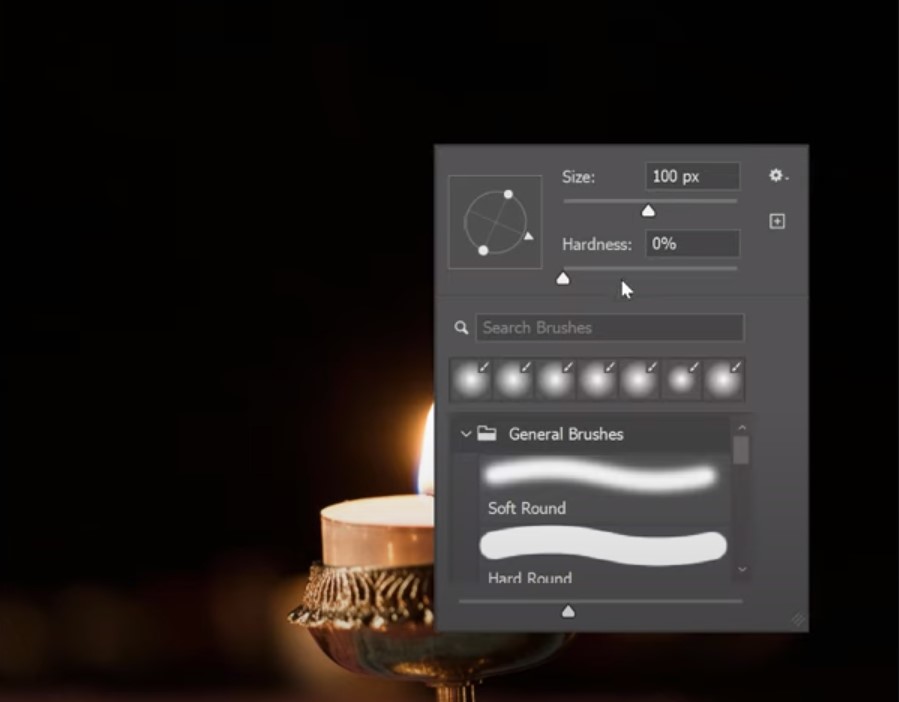
- Select the Brush Preset Picker from the Options Bar;
- It is better to pick the Soft Round Brush among the available tools. The best size for the first stroke of this brush tool – about 270 pixels to 390 pixels;
- You may experiment with the settings from this point, but the best results for the Photoshop smoke overlay effect happen to be if the Hardness parameter is at 0%, the Flow is at 40% and the Opacity is at 100%;
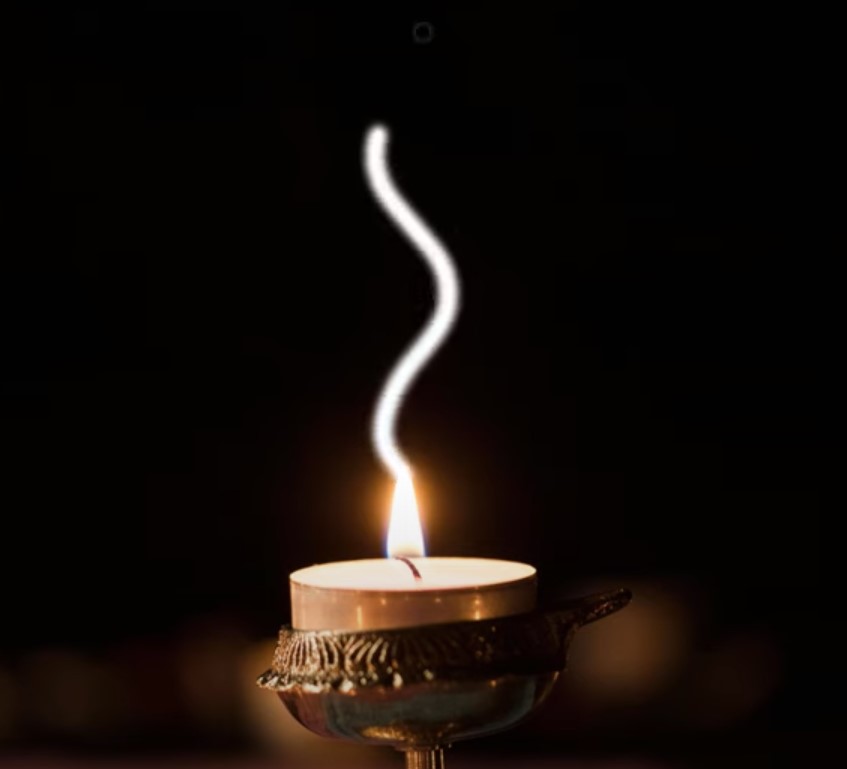
- Shape the letter “S” with the brushstroke. Gradually add more brushstrokes at various sizes. The second stroke has to be half the size of the first stroke (from the Options Bar) – that is the general rule of thumb;
- Drag the mouse around the first stroke’s edge. As a result – the second stroke will look a bit bolder than the first stroke;
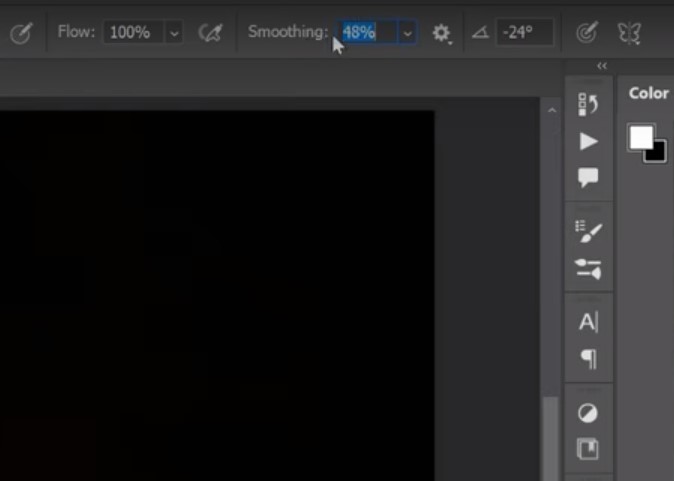
- For the next brushstroke, you should increase the Smoothing setting up to 100%. The stroke has to be tight around the edge of the first stroke;
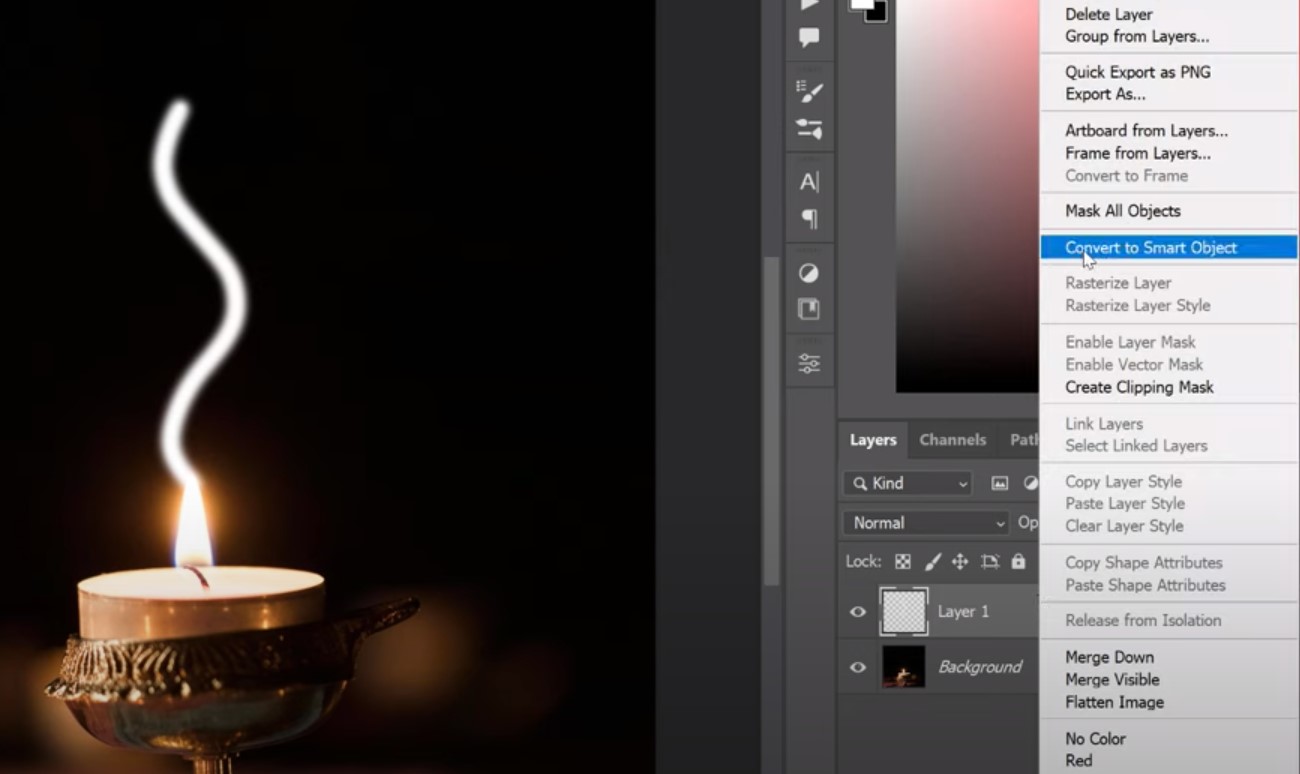
- Select the smoke layer. Then click the context menu and choose the option Convert to Smart Object;
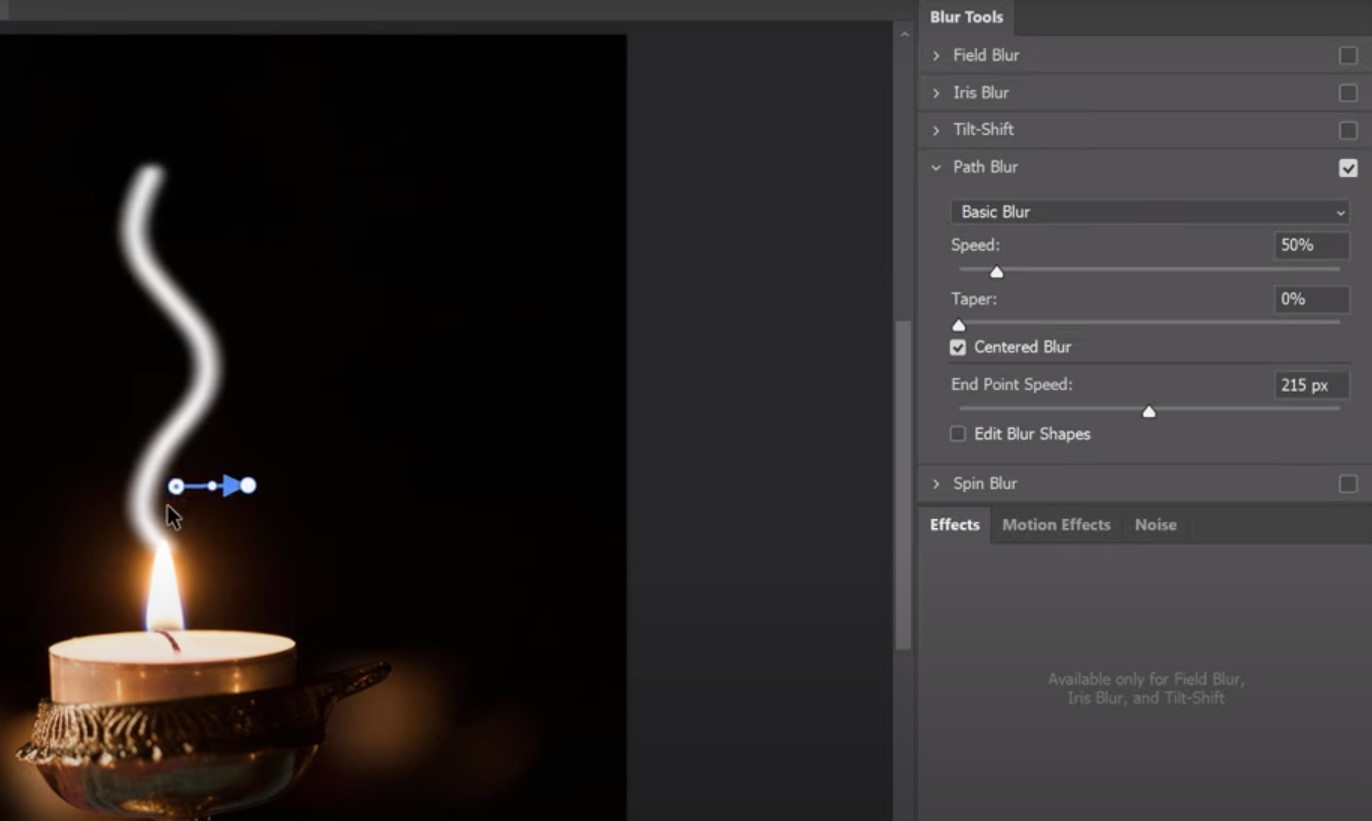
- To spread out the white areas of the Photoshop smoke overlay image and avert the black areas, you should use the Filter 🡪 Other 🡪 Maximum. There is a preview option, set the Preserve to Roundness. Apply the Radius slider to adjust the desired effect. Confirm by clicking “OK”. But, before applying the Transform Mesh, make sure the layer is in a Free Transform mode (Edit 🡪 Free Transform);
- Select the Warp Tool from the Options bar. Customize the mesh lines, intersections, and anchor points;
- Add more lines to the mesh – use the Split options from the Options bar;
- For more dimension, repeat the steps to create the second layer of the smoke overlay Photoshop project (optionally);
The final editing revolves around the adjustment of Fill, Opacity, and Position. It is optional.
How To Add Smoke Overlay in Photoshop: Brushes vs. Overlays vs. From Scratch
As you can see, there are mostly 3 key methods of adding free smoke overlay Photoshop to create a unique and mesmerizing effect. Surely, there are dozens of different techniques to try and you can think of a new method of your own when experimenting with this application. For example, you can check the detailed tutorials on YouTube.
To compare the key methods and pick the most suitable for you, check the following pros and cons of each technique gathered in a comparison table:
| Method | Advantages | Disadvantages | Overall | Speed of Use | Simplicity of Use | Quality and Realistic Appearance |
|---|---|---|---|---|---|---|
| Smoke Brushes |
|
May be insufficient for high-resolution projects | 88% | 96% | 95% | 75% |
| Smoke Overlays |
|
Often need to mask and use color shifting | 90% | 82% | 88% | 98% |
| Photoshop Creation |
|
|
52% | 64% | 61% | 32% |
Summing up the comparison, the Smoke overlay method proposes the best hi-resolution quality possible and the most realistic effect. If you seek the paramount details, choose this method. If you prefer adding the smoke overlay in Photoshop in the quickest way possible, then pick the Smoke Brushes method; though get ready to sacrifice the ultra-high resolution. Creating From Scratch with the application itself won’t require using any external sources to get free smoke overlay in Photoshop, but needs more effort and skills.
The most wonderful thing – you may use any of these methods to create awesome smoke effects in any visual project including videos. Additionally, it’s possible to tweak your Photoshop smoke overlay for the video with VideoProc Vlogger, one of the best editors in the category.
How to Apply A Smoke Overlay in Photoshop: Tips
If you are a photo editing newbie, it is better to read a few expert guides and recommendations before creating an innovative smoke overlay for Photoshop.
These tips mostly focus on such useful things to follow when working in Photoshop:
- Use different free smoke overlays in Photoshop in your project to achieve a more complex effect. Consider applying various Opacity and Blend modes with customized settings. Such an approach can add extra depth and the smoke effect will give an illusion of being more dynamic;
- Match the colors to make the smoke effect look more natural in the background scene. The color matches the smoke overlay in the Photoshop image. For example, you may add a new adjustment layer under the Hue/Saturation setting. Just clip it to the smoke overlay. Customize the parameters of the hue, lightness, and saturation;
- To add extra volume to the almost finished smoke effect, launch the work area of Photoshop, and find the Filter menu. Then click Render and from the context menu choose Clouds. The following step is to set the layer mode to the Screen;
- Do not forget to add layer masks when adjusting the Opacity effect to your smoke overlay Photoshop project;
- Consider using the smoke overly in the photos showing the rainy day – it will look awesome;
- To distract users from any undesired objects in the photo, you may cover it with a smoke overlay Photoshop image;
- Before applying the smoke overlay in the Photoshop image, fully complete the other steps with retouching like color correction, cropping, etc.;
- Use the contrast of black and white images to add a more dramatic effect;

The Smoke Overlay Photoshop FAQ:
- How to make the fake smoke effect with Adobe Photoshop?
Adding fake smoke rings or traces is easier if you already know how to create the smoke Photoshop overlay effect. The quickest way is to find the free smoke overlay for Photoshop online (preferably shot on a black background). Then you should place the image as a new layer by customizing the settings of the blend mode to the main Screen of your work area. The method is quick but the effect will be as basic as possible.
- How to enable Photoshop’s layer effects?
Find and click the tiny icon “FX” right to the layer’s name – look at your Layer’s Panel. The context menu will appear showing various layer FX effects applied to every layer located inside the panel. Every layer can have as many effects as you require.
- Can you overlay images in Photoshop?
To create a simple, two-toned image overlay – pick the “Gradient Overlay” style. First, you should open the image in the application. Then just click the Layer button, and choose the picture layer. Then, click the “+” button and alter the Blend mode to add the desired effect.
- How do you create a nice-looking effect with the Burn Tool?
Adding smoke to your picture with Photoshop can be challenging. The easiest method is to use the default Burn Tool with a set opacity of 50%.
Conclusion
Now you know how to add Photoshop smoke overlay to your creative photo editing project, slideshow, or presentation. This knowledge is not limited only by the smoke effect; you can use the above-mentioned techniques to create any interesting project with free overlays. The best advice for newbies – experiment and learn new Photoshop tricks to create really interesting effects with overlays!