Riju of Gerudo Town quest walkthrough in Tears of the Kingdom
Step-by-step Riju of Gerudo Town quest guide in Tears of the Kingdom: desert navigation, training, and the Gibdo threat explained.
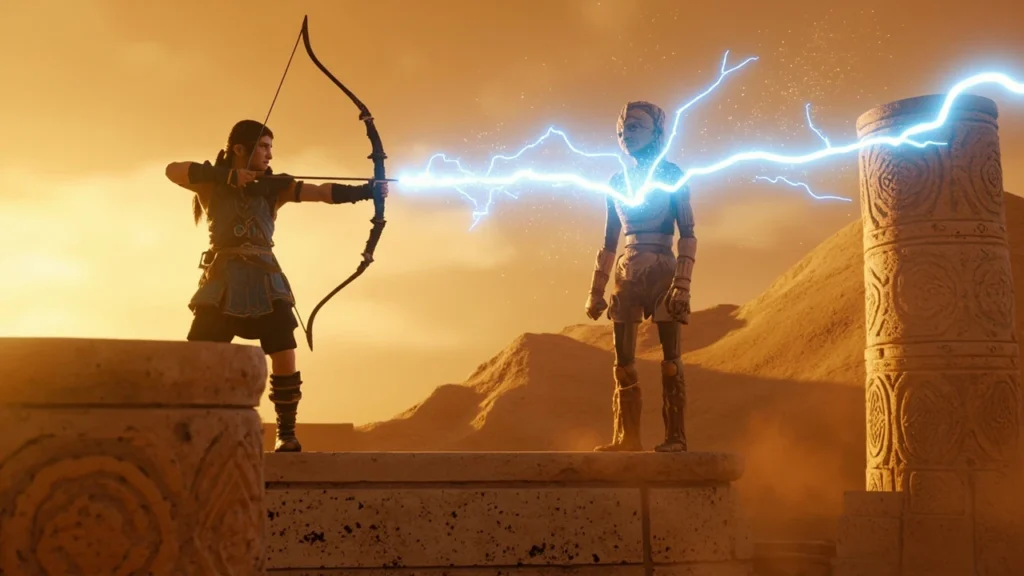
Riju of Gerudo Town: how this TotK quest actually plays out
The Riju of Gerudo Town quest in The Legend of Zelda: Tears of the Kingdom is the first of the four Regional Phenomena main quests, and it sets the tone for how the rest of the game’s critical path handles traversal, combat preparation, and story pacing. Players who leave Gerudo Town expecting a straight conversation quickly discover that the regional sandstorm blocks the map, a Gibdo threat has re-emerged, and Riju herself needs combat coaching before she can help. Understanding how the quest is structured is the difference between wandering for twenty minutes and finishing the entire chain in well under an hour, which is why the quest is a useful case study in how open-world game design threads narrative, traversal, and player skill together.
This guide treats the quest the way a careful walkthrough writer would: by isolating what the game actually requires, where the usual failure points sit, and how Riju’s role fits into the broader questline. It also pulls back to look at why this particular quest is a good design example of environmental storytelling, controlled skill gating, and lateral puzzle design, which matters because several of the techniques used here show up across the rest of the game.
What the Riju of Gerudo Town quest actually is
Riju of Gerudo Town is one of the four core main quests that make up the Regional Phenomena arc in Tears of the Kingdom, and it is the entry point into the Gerudo Desert region. The quest’s framing problem is simple: a localized sandstorm has cut the region off, Gerudo Town is dealing with a resurgent Gibdo threat, and Riju needs to be convinced and trained before she can confront the cause. Mechanically, the quest chains together three distinct segments: desert navigation to reach Riju at the ruins north of town, a training encounter that teaches the player how to direct Riju’s lightning strike, and the fight at Kara Kara Bazaar that introduces the Gibdo combat pattern the rest of the regional content will lean on.
The quest is short compared to later Regional Phenomena entries, but the design team uses it to teach three systems at once: weather-affected navigation, partner-assisted combat, and the early Gibdo encounter. That is why the walkthrough is worth understanding in detail, even for players who have already completed it once. Each step is doing more than advancing the story; it is teaching the player something the game will keep asking for across the rest of the desert and beyond.
How the quest starts and where to find Riju
The quest begins the moment you leave Gerudo Town heading north toward the marker the map places just outside the settlement. The map becomes unreliable as soon as you cross back into the desert because the sandstorm interferes with the Sheikah Slate and its successors. In practice that means you navigate by sight using the visible ruins as a landmark, which is the game’s way of teaching the player to stop relying on the map overlay when the environment demands it. The ruins are visible from the Gerudo Town entrance, slightly to the left, so even with the storm active the path is not random.
As you approach the central structure, you will hear a loud bang. Moving toward the source reveals Riju summoning lightning strikes on the site. Speaking to her starts the conversation, and she explains the immediate problem: Gerudo Town is dealing with the Gibdo, and the sandstorm is making the situation worse. This is the player’s first clear window into the regional narrative, and it is also the first time the game uses an environmental event, lightning, as a character introduction rather than as a hazard.
Prerequisites before you leave Gerudo Town
There is no hard quest gate that prevents you from leaving town, but a small amount of preparation makes the quest measurably smoother. The relevant prerequisites are practical rather than story-locked:
- Heat resistance or heat-resist food, because the desert daytime temperatures still apply and the quest does not pause the heat meter.
- At least one bow in good condition with a handful of arrows, because the training encounter that follows is a bow-aiming exercise.
- One flame-emitting weapon or a fire-producing material, since Gibdo encounters later in the chain are vulnerable to fire and you do not want to backtrack.
- An empty Ultrahand build slot, in case you want to reposition the training dummy or a piece of cover at the bazaar, which the game does not require but which is often faster than the intended path.
None of these are strict requirements, but each one removes a small friction point that the game otherwise forces you to solve on the spot. The earlier you accept that this quest is teaching you to plan regionally rather than to improvise in the room, the less time you spend re-entering Gerudo Town mid-quest. It is also the moment where the inventory habits you built in the first few shrines start to matter; players who cooked heat-resist meals in the early game usually finish the desert content an hour earlier than players who waited until they needed them.
Step-by-step walkthrough of the quest
The walkthrough below mirrors the structure used in the official quest guide published by IGN, with the same checkpoint order the game itself enforces. The advantage of following the quest in its designed sequence is that each segment hands the player a tool, mechanic, or piece of information that the next segment assumes you already have. If you skip a step, the next segment will quietly feel harder than it should, and the recovery tends to cost more time than the original step would have.
Step 1: leave Gerudo Town and reach the ruins
Exit Gerudo Town through the main gate and follow the path north toward the marked location. The sandstorm will immediately start interfering with the map, so expect the markers to grey out and the compass to behave inconsistently. Trust the silhouette of the ruins rather than the waypoint, because the ruins are tall enough to be visible from the town entrance even with the storm active. The visible approach is also the safer one: the surrounding sand hides Molduga territory and the occasional Lizalfos patrol, both of which become much more dangerous when you are forced to detour because you lost the marker.
When you reach the central platform, you will hear the lightning strike effect before you see Riju. Walk toward the source of the sound to trigger the conversation. This is the moment the quest transitions from traversal into narrative, and the camera pulls in to frame Riju as an active participant rather than a static quest giver. Pay attention to the camera framing here, because it tells you which character the quest considers the active agent of the scene; the same framing is reused later when the chain hands control back to the player.
Step 2: complete Riju’s lightning training
Riju will explain that she is training to defend the town and will ask you to help with a controlled exercise. The training has two distinct rounds, and each one teaches a different aiming behavior. Understanding what the rounds are testing makes the second round trivial, because the round is testing the player’s mental model of the lightning strike rather than the player’s reflexes.
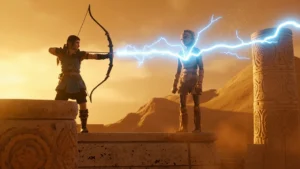
- Round one: single dummy, single shot. Draw your bow and aim directly at the training dummy. Riju will charge her lightning strike and channel it through the arrow path to hit the target. The lesson here is that the arrow is a conductor: where the arrow points is where the strike lands. Players who try to freehand the round without a drawn bow usually find that Riju’s strike simply does not fire, because the chain requires a live conductor.
- Round two: three dummies, one strike. This is the round players get stuck on because they keep aiming at one dummy at a time. The intended solution is to aim at the rock positioned in front of the middle dummy and let the ring of lightning travel outward to hit all three dummies in sequence. You need to wait until the ring has passed each dummy so Riju has enough time to fully charge the attack. The rock is not decorative; it is the conductive object the round is built around, and removing it from the scene would break the puzzle entirely.
After the training finishes, the quest does not give a long cinematic. Instead, a mysterious sound rings out, and Faundi appears to tell Riju that Gibdos are attacking the Kara Kara Bazaar. This is the narrative pivot that pushes the player out of the controlled training encounter and into the first real combat application of the mechanic. The pacing here is deliberate: the game has just given the player a tool and a target, and the next scene immediately asks them to use both at once.
Step 3: defend Kara Kara Bazaar from the Gibdo
Travel to Kara Kara Bazaar, which is the desert settlement just outside Gerudo Town. The combat encounter begins as soon as you arrive. The Gibdo enemies here use the same attack patterns the rest of the Gerudo region’s content will reuse, so this fight is effectively a tutorial for the regional combat loop. Fire is the main vulnerability, headshots stagger them, and staying out of their grabbing range is the difference between a clean fight and a long one. The bazaar also has a few environmental pieces you can use for cover, and the merchant stalls are close enough to the spawn point that the Gibdos will not immediately push into them if you kite correctly.
Once the Gibdos are cleared, the quest completes and the next Regional Phenomena quest, “The Gibdo’s Chief Concern” or the equivalent chain entry, becomes available. The transition is automatic, which is worth knowing because it means there is no return-to-Gerudo-Town requirement between the two quests. The quest log simply rolls the next objective into the same entry, and the regional map updates to mark the next waypoint once the bazaar is secure.
Why this quest works as a game design example
From a design perspective, Riju of Gerudo Town is a tight, sixty-minute arc that manages to teach navigation, a partner mechanic, a new enemy type, and a regional narrative hook without feeling overloaded. Looking at the quest through a development lens makes it clearer why it sits at the front of the regional chain. Three design choices stand out: layered teaching, environmental constraint as a difficulty dial, and the use of a single visual effect to link three very different gameplay moments. None of these choices are unique on their own, but the way the quest stacks them is what makes the chain feel like a single coherent arc rather than three unrelated scenes.
Layered teaching through a single mechanic
The lightning strike is the same ability across all three quest segments, but the way the player is asked to use it changes. In round one, the player is asked to aim at a single target. In round two, the player is asked to use the same ability on multiple targets by aiming at a relay object rather than a direct target. In the bazaar fight, the player is asked to keep using that conductor logic against enemies that do not stand still. The mechanic does not change; the player’s mental model of it does, and that progression is what makes the later Gerudo content feel earned rather than introduced out of nowhere. The same pattern shows up in shrines across the game, but the desert chain is the cleanest place to see it because every step is gated by the same narrative thread.
Environmental constraint as a difficulty dial
The sandstorm is doing two jobs at once. Narratively, it is the symptom of the regional problem. Mechanically, it removes the map overlay, which forces the player to navigate by landmarks. That dual use is a common design pattern in open-world games: a single environmental event serves as both story and system. By the time the storm clears at the end of the regional chain, the player has been retrained to read terrain rather than icons, which makes the game’s optional content feel less dependent on map markers. The storm also affects audio cues, which means the lightning training is partly an audio direction exercise as well as a visual one.
One visual effect, three roles
Riju’s lightning is introduced as a character beat, then used as a training tool, then thrown against the player as a weapon the Gibdo resist. The same effect carries narrative weight in scene one, mechanical instruction in scene two, and combat context in scene three. That kind of visual economy is rare in open-world games, where new abilities are usually locked behind shrines and never appear in the story until the player has them. Here, the player watches the effect before they ever use it themselves, which is a subtle but effective way to build anticipation for the associated ability later in the game. The reuse also saves on asset work, which is part of why the desert chain has the visual variety it does despite being set in a single biome.
Common failure points and how to recover
Most of the friction players report on this quest comes from a small set of repeated mistakes. The good news is that each one has a clean fix, and the fix is usually the same logic the game is trying to teach in the training round. The pattern that ties the failures together is a tendency to fight the scene’s design rather than to read it: the desert is built to be navigated by sight, the training is built around a conductor object, and the bazaar fight is built around spacing. Once you stop trying to brute-force those three things, the quest becomes linear.
Lightning training round two misses
The most common stall is round two of the training. Players aim at the dummies directly and try to chain three shots in a row, which does not work because Riju’s lightning ring needs a conductive center. The reliable fix is to aim at the rock, not at a dummy, and to wait for the ring to travel through each target before the next cast. If the ring fades before reaching the third dummy, the timing is off; back away from the rock slightly to give the ring more travel time. If the rock has been knocked out of position by an earlier attempt, the round becomes much harder, and reloading the autosave is usually faster than fighting the geometry.
Map disappears mid-desert
Players often report the map going blank the moment they step outside town. This is intentional and not a bug. The fix is to stop treating the map as your primary navigation tool in this region and start using visible terrain. The ruins are tall enough to be seen from the town gate, so the path is not actually obscured; only the waypoint layer is. Climbing a nearby dune or pillar will restore partial map function for a few seconds, which is often enough to reorient before the storm obscures the layer again.
Gibdo at Kara Kara Bazaar overwhelms the party
The bazaar fight is the first place many players encounter Gibdos in numbers, and the encounter can snowball if the group clusters. The fix is to kite one Gibdo at a time away from the pack, use fire on a single target, and prioritize headshots when an arrow is available. Riju’s lightning continues to help in this fight, but she is not invincible and should not be used as a tank. The merchant stalls at the edge of the bazaar are a good fallback position: Gibdos path through the central plaza rather than around the stalls, so a few well-placed flame arrows can thin the pack without forcing a melee engagement.
Heat damage before reaching the ruins
If you walked out of town without preparing, the desert heat will deplete your hearts before you reach Riju. The fastest in-quest fix is to cook any four heat-resist ingredients into a meal; the longer-term fix is to remember that desert regions in TotK require the same preparation layer as a boss arena. Heat-resist elixirs work, but they use up a slot that the rest of the chain would rather have a stamina or attack boost in, so meals are usually the better trade for this specific quest.
Misreading the quest order
Some players try to reach the Lightning Temple before clearing the bazaar fight, which the game technically allows but which leaves the regional chain in a half-finished state. The cleanest order is ruins, training, bazaar, temple, sage. Skipping the bazaar removes the Gibdo tutorial and forces the player to learn the enemy pattern inside the temple, where mistakes are punished more harshly. The same logic applies to side content: clearing the bazaar first makes the surrounding shrines and the Lightning Temple itself feel like an extension of the same arc.
Quest structure comparison with the other regional main quests
Each of the four Regional Phenomena main quests uses a different structure to teach the same three goals: introduce a region’s mechanics, introduce a region’s antagonist, and unlock a regional sage. Comparing the Riju of Gerudo Town quest with the others is useful because it makes the design pattern visible. The table below summarizes the structure without leaking later story beats.
| Quest element | Gerudo (Riju) | Rito (Teba) | Goron (Yunobo) | Zora (Sidon) |
|---|---|---|---|---|
| Environmental constraint | Sandstorm that hides the map | Wind currents that block flight paths | Heat that drains resources in real time | Sludge that slows movement and water traversal |
| Skill taught before the regional boss | Partner lightning redirection | Mid-air arrow redirection | Melee weapon buff synergy | Swim dash and splash damage combos |
| Enemy introduced during the quest | Gibdo | Wyrm | Gleeok fragment variant | Sludge-covered Lizalfos |
| Partner ability the player keeps | Riju’s lightning summon | Teba’s wind updraft | Yunobo’s charge | Sidon’s water shield |
| Approximate length to first clear | 45 to 70 minutes | 50 to 80 minutes | 60 to 90 minutes | 55 to 85 minutes |
| Order of skill and enemy segment | Skill first, enemy second | Enemy first, skill second | Skill and enemy interleaved | Enemy first, skill second |
| Map interaction during quest | Map overlay disabled by storm | Map overlay unchanged | Map overlay unchanged | Map overlay unchanged |
The Gerudo entry is the shortest of the four and the only one that places the skill-teaching segment before the enemy-introduction segment. That ordering is not accidental. The Gibdo is the most mechanically dense of the four regional enemies, so the quest front-loads the bow-aiming exercise to make sure the player has a working conductor model before they need it in combat. The other three chains assume the player has already absorbed the relevant system from earlier shrines or from the tutorial region, which is why their order can be more flexible.
Loadout and consumable reference for the desert
Because the desert chain is so dependent on preparation, a small reference table for the most useful consumables helps players plan a clean run. The table below covers the items that actually change how the quest plays, not every consumable that is technically available.
| Consumable or tool | What it solves | Where to source it before the quest | Typical duration or count |
|---|---|---|---|
| Heat-resist meal | Desert heat damage | Cook four heat-resist ingredients at any pot | 10 to 30 minutes per meal |
| Fire weapon or flame fruit | Gibdo fire vulnerability | Gerudo Town shops, desert loot | 20 to 40 hits per weapon |
| Bow and arrow stock | Training and bazaar headshots | Gerudo Town merchant, shrine chests | 15 to 30 arrows typical |
| Stamina recovery food | Sprint and glide in the storm | Cooked endura carrot or stamella shroom | One wheel of stamina restored |
| Ultrahand-friendly planks | Optional bazaar cover | Gerudo Town rooftops, desert debris | Three to six pieces |
The table is a starting point, not a strict recipe. The most common adjustment is to swap one stamina food for a second heat-resist meal on hot days, because the heat meter is the only resource that does not refill passively during the quest. Players who plan to clear the Lightning Temple on the same sitting should also carry at least one extra fire weapon, since the temple reuses the Gibdo weakness without giving the player a chance to restock.
How the quest integrates with the rest of the game
Riju of Gerudo Town is not a self-contained story. It is the trigger that unlocks the Lightning Temple, which in turn unlocks Riju’s sage spirit, which is required to face the game’s final challenges. Understanding that dependency is the reason to clear this quest before detouring into optional content. The game does not block you from doing so, but the sage ability is part of the build most players rely on for the late game, and the desert’s shrine density means the optional content is more rewarding after the temple is open.
Unlocking the Lightning Temple
After the bazaar defense, the quest chain points the player toward the Lightning Temple, where Riju’s arc is completed. The temple is a self-contained dungeon that uses the lightning mechanic in a new context: instead of redirecting Riju’s strike at training dummies, the player redirects it across environmental conductors to open doors and defeat a regional boss. The skills the player learned in round two of the training are the exact skills the temple assumes, which is why the temple never re-explains the conductor logic. Players who skipped the bazaar fight often find the temple opaque, because they have not built the mental model the temple’s puzzles are built on.
Riju as a sage companion
Once the temple is complete, Riju becomes available as a sage spirit who can be summoned in combat. Her lightning strike scales with the player’s heart pool, which makes her one of the higher-damage sage options in the late game. The teaching structure of the original quest is why this ability feels intuitive rather than overpowered: the player already learned to think of lightning as a conductor they aim through, not a skill they fire at enemies directly. The sage summon also reuses the same charge animation the player saw in the training, which keeps the visual language consistent across the entire chain.
Optional content unlocked by the regional chain
Clearing the Gerudo regional chain opens the desert’s shrine density, several side quests tied to the Gerudo resistance, and the second half of the Gerudo Desert map. The optional content in this region tends to lean on fire and lightning setups, which is why preparing for the bazaar fight well pays dividends long after the quest completes. The desert’s shrine puzzles in particular reuse the conductor logic from the training, so the same aim-at-the-relay habit that solved round two keeps paying off across the region.
Tips for first-time players returning for a second playthrough
On a second file, the quest is short enough that it is tempting to skip preparation. The fastest clear on a fresh save is still around forty minutes if you prepare the right loadout, and the same preparation that helps the first time still helps the second time. The difference is that returning players usually want to optimize the side content the quest unlocks, and that changes the loadout priorities. Where a first-time player might prioritize survival, a returning player usually prioritizes shrine density and shrine quest count.
Loadout priorities for a speedrun-style clear
The fastest practical loadout for a second run is one that lets you ignore the heat meter and skip the backtracking that a missing consumable forces. The list below is the minimum kit that makes the desert quest feel like a straight line rather than a loop.
- Two heat-resist meals or elixirs with at least twelve minutes of duration, so the heat meter is never the bottleneck.
- One fire-emitting weapon, ideally a fire sword or a flame-emitting fused weapon, for the bazaar fight and the temple that follows.
- One bow with a thirty-shot quiver, because the training and the bazaar together will burn through ten to fifteen arrows on a clean run.
- One fast-travel unlock inside the desert, so you do not have to walk the full approach on a second pass.
- One stamina recovery dish, because the approach to the ruins often involves a glide that empties the stamina wheel if the storm is active.
When to detour and when to push through
The single most useful decision rule for this quest is to push through the chain in one sitting rather than to detour into side content between rounds. The lightning training is a short, controlled encounter that is much easier to do right after round one than to come back to later, because Riju’s training space is the same on a return visit but your mental context is not. The same rule applies to the bazaar: the Gibdo pattern is more readable when the previous round is still fresh. The only detour that consistently pays off during the chain is the nearby shrine, because its puzzle reuses the conductor logic and reinforces the training before the bazaar fight.
Frequently asked questions
Where do I start the Riju of Gerudo Town quest?
The quest starts automatically when you leave Gerudo Town heading north toward the marked location, or it can be picked up from the quest log if you triggered it earlier and left the area. The first objective is to reach the ruins just outside the town gate where Riju is training.
Do I need to have completed any other quests before this one?
You need access to Gerudo Town, which requires the standard regional entry steps. There is no other main quest that must be completed first, and the regional chain is designed so that any of the four can be picked up after the opening sequence.
How do I beat the second round of Riju’s training?
Aim at the rock positioned in front of the middle training dummy, not at the dummies themselves, and wait for the ring of lightning to travel through all three dummies before Riju fires her next strike. The lightning needs a conductive center to spread, which is what the rock provides.
Why does the map stop working in the desert?
The sandstorm is an intentional environmental effect that obscures the map overlay. It is not a bug. The fix is to navigate by visible landmarks; the ruins north of town are tall enough to be seen from the gate, so the path is not actually hidden.
What level should I be for the Kara Kara Bazaar fight?
There is no strict level requirement. The fight is a tutorial encounter for the Gibdo enemy type, and the game expects you to enter it with the bow-aiming skill you just practiced. Fire and headshots are the two highest-leverage tools in the fight.
What does the quest give me when it ends?
Clearing the quest progresses the Regional Phenomena arc, opens the Lightning Temple as the next step, and unlocks the Gerudo region’s shrine and side content. The sage ability itself is granted at the end of the temple, not at the end of this quest.
Can I skip the training and still finish the quest?
No. The training rounds are required to advance the conversation with Riju and to unlock the next objective. The training is also the only way the player learns the conductor logic that the rest of the region’s content assumes.
Does Riju help in the bazaar fight?
Yes. Riju continues to support the player at Kara Kara Bazaar with her lightning strike, and the conductor logic you used in the training applies in the bazaar combat. She is durable but should not be left alone in the middle of a Gibdo group.
What is the difference between the Gibdo enemies and the monsters I have fought before?
Gibdos are wrapped, mummy-like enemies that resist most physical damage and are highly vulnerable to fire. They grab and combo at close range, so spacing and headshots are the most reliable counter. They are introduced in this quest and reused across the rest of the Gerudo region.
How long should the quest take on a first playthrough?
Most first-time players clear the quest in 45 to 70 minutes, including the training rounds and the bazaar fight. The wide range reflects how much time the player spends in the sandstorm looking for the ruins without map support; players who trust the visible landmarks finish the quest noticeably faster.